
A sightline is the visible width of frame between two panes of glass, measured face on from inside the room. On aluminium lanterns it ranges from about 38mm on a slim system to about 75mm on a heavier one, and on timber it runs from 60mm to well past 100mm. That number is the single most quoted figure in lantern marketing and the least useful on its own, because a bar can be narrow on the face and enormous in depth, and depth is what you see from anywhere except directly underneath.
Where the measurement is taken
The honest measurement is glass edge to glass edge across the internal face of the bar, taken at right angles to the bar, in the middle of its length. That is the figure that describes what interrupts the view.
Three other numbers get quoted as though they were the same thing. The width of the aluminium profile alone, ignoring the glazing gasket, which flatters by 6mm to 10mm. The width at the narrowest point of a tapered bar, which flatters by more. And the external capping width, which is a different measurement entirely and usually wider. When you compare two quotations, insist that both are stating the internal glass to glass dimension, or you are comparing nothing.
The four members and the work each one does
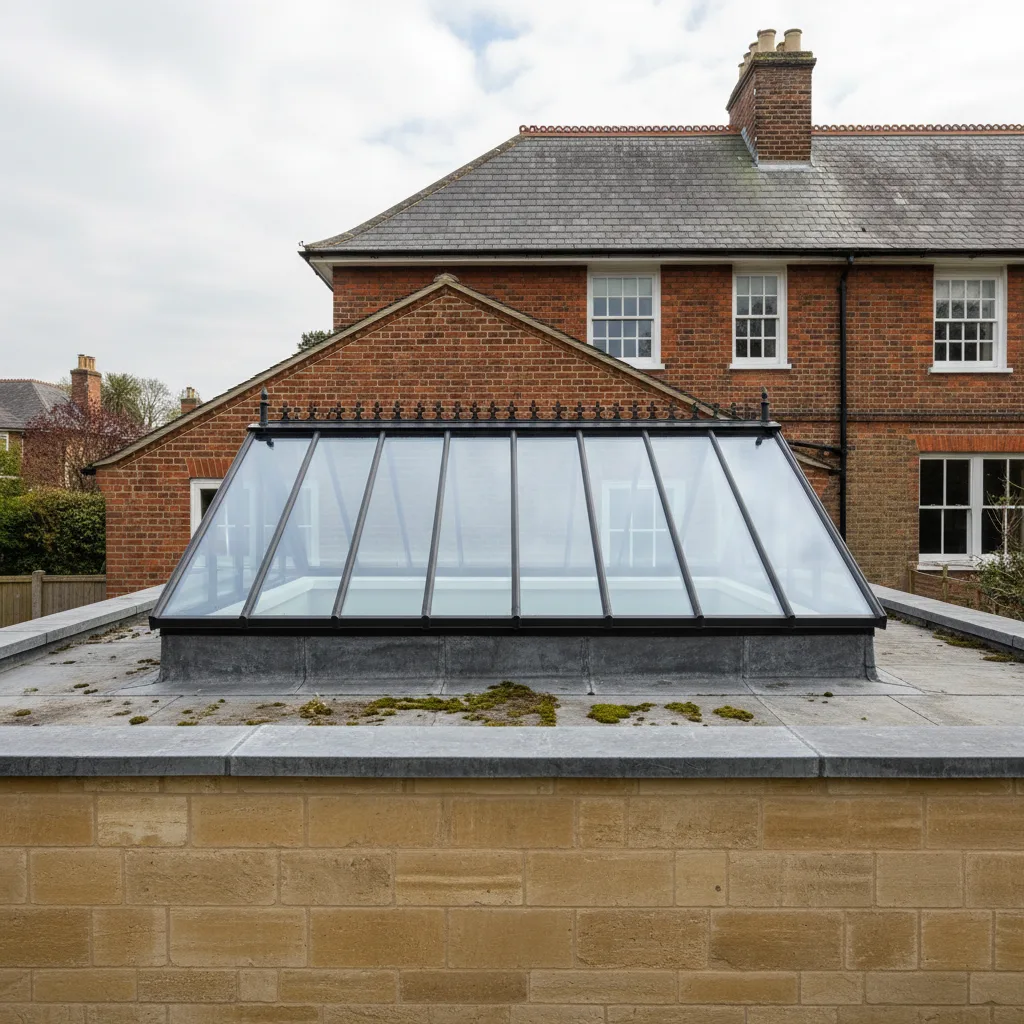
A conventional lantern has a ridge running along the top, hip bars from the ridge ends down to the corners, rafter bars running up the slope from the eaves to the ridge, and an eaves or sill member sitting on the kerb.
They carry very different loads. The rafter bar carries the glass either side of it and delivers that load to the eaves and the ridge, so it is the deepest structural member. The ridge collects the top of every rafter and resists the outward thrust of the two slopes, so it is the widest thing you see. The hip does both jobs at an angle. The eaves member takes the whole assembly down onto the kerb and provides the drainage path. Any sightline claim that quotes one number for the whole lantern is quoting the rafter bar and hoping you do not look at the ridge.
Why bars are deep rather than wide
A glazing bar is a beam. Its resistance to bending goes up with the cube of its depth and only in direct proportion to its width. Doubling the depth makes it eight times stiffer. Doubling the width makes it twice as stiff and twice as visible.
So every lantern designer takes the same route: keep the face narrow, push the section down into the room. A 45mm sightline on a bar 130mm deep is normal, and from a chair at the side of the room you are looking along that 130mm, not across the 45mm. The lantern reads far heavier from an angle than the brochure photograph taken from directly below suggests.
Span drives depth, and here is the arithmetic
The rafter bar spans from eaves to ridge. On a lantern 2m wide with a 25 degree pitch, that slope length is about 1.1m and the bar is short. On a lantern 4m wide, the slope length is about 2.2m, and the bar is carrying twice the glass over twice the span.
Bending moment rises with the square of the span, so doubling the span multiplies the demand roughly fourfold, while the depth needed rises roughly with the square root of that. In practice a manufacturer will move you up through their range: a 100mm deep bar to 1.4m slope length, 130mm to 2m, 160mm or a reinforced section beyond that. Wind uplift and snow load in the design case both push the same way.
The consequence is worth stating plainly. A big lantern cannot have the same sightline as a small one in the same system. If a supplier quotes you the same slim figure for a 5m unit as for a 2m unit, either the small one is over-engineered or the big one is under-designed.
Bar spacing, and the pane sizes it produces
Once the bar depth is settled, the spacing between rafter bars decides everything else. Closer spacing means smaller panes, thinner glass, lighter units and shallower bars. Wider spacing means fewer lines overhead and a great deal more weight on each one.
Most systems sit comfortably at 700mm to 1,000mm between rafter centres. Push beyond about 1.2m and the glass unit itself has to get thicker to take snow and wind load, often moving from a 6mm outer to an 8mm or 10mm outer, which adds weight, which demands a deeper bar, which is the loop that catches people out. Fewer bars is not automatically lighter looking.
There is also a manufacturing limit. Very large single panes are restricted by what the glass processor can toughen and laminate, and by what can be lifted onto a roof by hand. Past roughly 2.5m by 1.3m per facet you are into mechanical lifting, which changes the cost of the day.
Typical dimensions across systems
| Member | Slim aluminium | Standard aluminium | Timber core, aluminium clad | All timber |
|---|---|---|---|---|
| Rafter bar face width | 38mm to 48mm | 55mm to 70mm | 60mm to 80mm | 70mm to 110mm |
| Rafter bar depth | 100mm to 165mm | 90mm to 140mm | 120mm to 180mm | 130mm to 200mm |
| Ridge face width | 60mm to 90mm | 80mm to 120mm | 90mm to 130mm | 110mm to 160mm |
| Hip bar face width | 45mm to 60mm | 60mm to 85mm | 70mm to 95mm | 80mm to 120mm |
| Practical maximum width | 4.5m | 4m | 5m | 3.5m |
Treat these as the range we see rather than as any one manufacturer’s data. Every system has its own geometry, and the reinforced options within a range change the numbers again.
The thermal break lives inside the bar
An aluminium bar without a thermal break is a metal path from the room to the sky. Every lantern worth fitting has a polyamide barrier separating the inner and outer aluminium, typically 14mm to 34mm wide within the section.
That barrier occupies width. A slim bar has less room for it, which is why the slimmest systems are not automatically the best performing ones. Ask for the frame U-value, not just the glass U-value, and ask for the whole unit figure. A lantern with excellent glass and thin thermal breaks can perform worse overall than one with modest glass and a properly isolated frame, and the frame is where the condensation appears first.
External capping draws its own line
Outside, the bars are covered by a capping that clamps the glass down and sheds water. It is almost always wider than the internal sightline, often by 15mm to 25mm each side, because it has to lap the glass and hold a gasket.
From the garden, that capping is the lantern’s drawn line. A system with a 40mm internal sightline and an 85mm external capping looks slim from inside and conventional from outside. Some systems use a slim clip-on capping and a structurally bonded outer pane to keep both faces narrow, which is why the external dimension is worth asking for separately.
Working out the glass fraction honestly
Here is a calculation worth doing before you commit. Take the lantern footprint, then subtract the area taken by every bar, the ridge, the hips and the eaves frame. A 2m by 3m lantern in a standard aluminium system with two intermediate rafters each side loses perhaps 15% to 18% of its plan area to frame. The same lantern in a slim system loses closer to 10%.
On the daylight side that difference is real but modest, because glazing area and perceived brightness are not linear. On the appearance side it is significant, because the eye reads the pattern of lines rather than the percentage. Two lanterns can differ by 6% in glass area and look completely different in the room.
The ridge is the heaviest line you own
Everyone specifies the rafter sightline and nobody asks about the ridge. It is the widest member, it runs the full length of the lantern, and it is directly overhead where you look at it most.

Ridge width is set by how the two slopes meet and whether the ridge also houses a vent. A lantern with an opening ridge vent needs a bigger head section to take the hinge and the actuator, sometimes 140mm across where the fixed version would be 90mm. That is a genuine trade against ventilation, and worth weighing alongside our page on ridge vents and how they are operated.
Eaves, sill and the line at the bottom
Where the glass meets the kerb there is an eaves member carrying a drainage channel, a gasket line and the fixing flange. Internally it presents as a band 60mm to 120mm wide around the whole perimeter.
Whether you see it depends on the reveal. Where the plasterboard is brought right up under the frame, that band is on display. Where the reveal is splayed and the plaster stops a little below the frame with a shadow gap, the eye reads the shadow rather than the aluminium and the lantern looks lighter. It is a five minute detail decision that changes the finished appearance more than 5mm of sightline does.
Corners, mitres and where quality shows
At each corner the eaves frame turns and the hip bar lands. Better systems use machined cast corners or fully welded and dressed mitres, so the junction is a single continuous line. Cheaper systems butt an extrusion into a bracket and cover the result with a plastic cap.
This is where two lanterns with identical published sightlines part company. Look at photographs of the corner and the ridge end. If those junctions are clean, the rest of the fabrication usually is too. If there is a moulded cover over the joint, the system is telling you something.
Colour changes what the eye measures
A dark bar against a bright sky reads as a thin line, because the contrast is high and the eye is drawn past it. A white bar reflects daylight and appears to swell, and in strong sun the reflected glare off a white capping makes a bar look considerably wider than it measures.
The practical consequence is that a standard 60mm anthracite lantern often looks slimmer in use than a 45mm white one. If slim appearance is the goal, colour is a cheaper route to it than a premium slim system. We go into the wider colour decision on our page about frame finishes and powder coating.
Structural glass without visible bars
At the far end of the market are lanterns where the panes are bonded to a hidden aluminium structure, so from outside you see glass and a thin joint of silicone, and from inside you see a slim inner frame. The visible line drops to around 20mm to 25mm of dark bonded joint.

They are expensive, they carry longer lead times, and they demand a kerb built to tighter tolerance than a conventional unit will forgive. On the right building they are the best looking thing available. On a modest extension they are a great deal of money for a difference most visitors will not consciously register.
Reading two quotations side by side
Ask both suppliers for six numbers: rafter bar face width, rafter bar depth, ridge face width, external capping width, frame U-value, and whole unit U-value at your actual size. Ask for them at your size, not at a nominal test size, because both sightline and performance change with the unit.
If one supplier answers all six and the other quotes a headline sightline and nothing else, you have learned something useful about both. Slim frames are a legitimate premium product and they cost real money to engineer. A number quoted without its conditions is just a number.
Where slim stops being worth paying for
Our honest position. On a lantern under about 2.5m in its longest dimension, the difference between a slim system and a standard one is visible if you look for it and invisible if you do not, and the money is usually better spent on the glass specification or on getting the kerb and reveal detail right. Our page on glazing and solar control covers where that money goes further.
On a large lantern the argument reverses, because the bars get deep and numerous and the frame starts to dominate. That is where a slim system earns its price, and where we would encourage you to spend it. If you want the six numbers above for the units we would propose at your size, call 01865 704245 and we will set them out before you commit to anything.
Four steps, no surprises
Survey
We look at the roof, the covering and the slope before we say anything about price.
Specification
The right unit and glazing for that roof and that orientation, in plain terms.
Fixed quote
Written, itemised and firm. The number does not move once work starts.
Install
Opening formed, unit set and weathered, covering made good. Notification is ours.
Helpful reading on this
Costs, comparisons and the questions we are asked most.
Tell us about your roof
We start with the building, the covering and the slope. Then we tell you what will suit it, and what it will cost, as a fixed written number.
- Surveyed before it is priced
- 10-year workmanship guarantee
- Building Control notification handled
- New installations and replacements