
A ridge vent is an opening section built into the top of a roof lantern, and on a domestic lantern it is almost always driven by an electric actuator, because the ridge is three to four metres above the floor and nobody is winding a handle up there. This page covers the vent types available, how the drives work, what has to be wired and when, and the details that decide whether the vent gets used or ignored after the first summer.
What a ridge vent is, physically
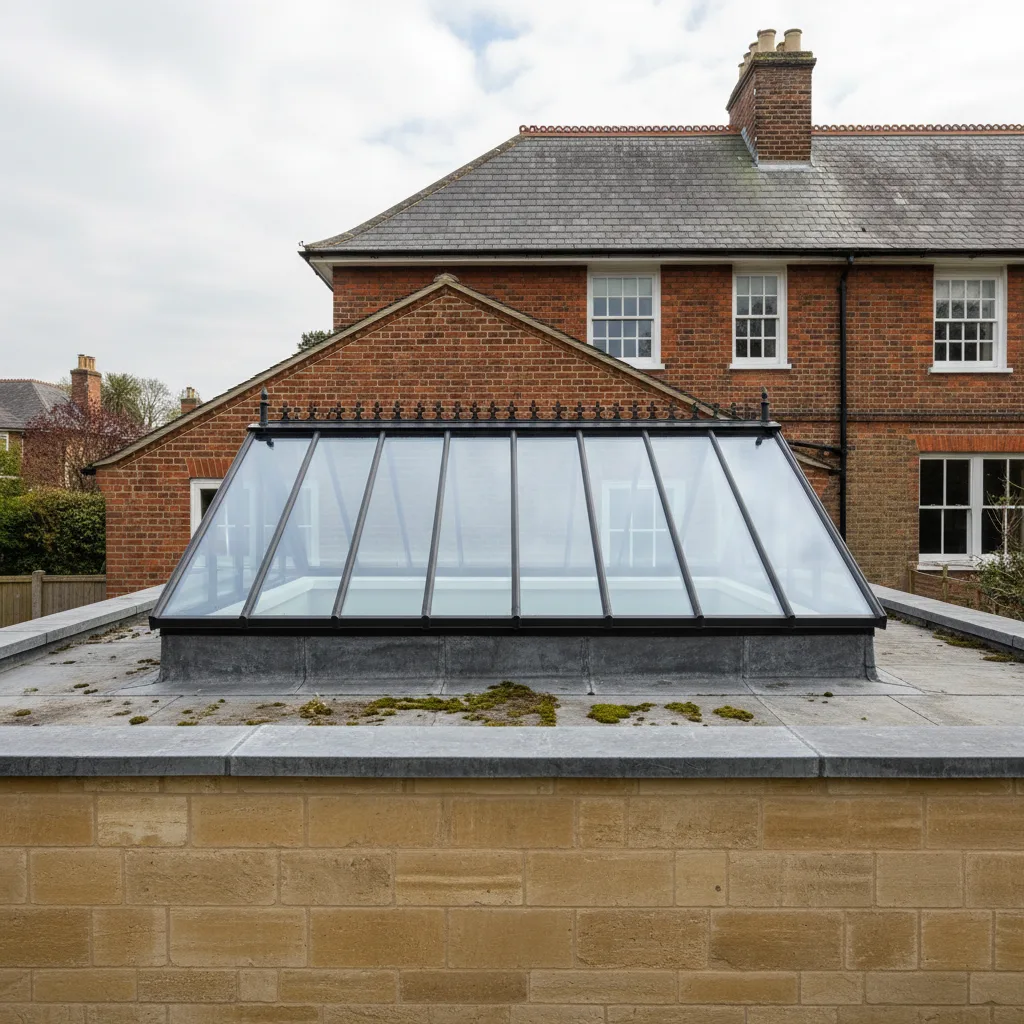
A lantern has a horizontal ridge bar at the top, with the pitched facets meeting it on both sides. A ridge vent replaces a length of that ridge with a hinged flap, typically glazed to match, hinged along one edge and pushed open by an actuator mounted inside the frame.
Opening travel is usually 200 to 400mm at the free edge, which on a 1000mm wide vent gives a clear opening of roughly 0.2 to 0.4 square metres.
The vent is weathered by its own gasket, which compresses when the actuator pulls the flap down onto the frame. That compression is doing the same job as the seal on a car boot, and like a car boot it needs the actuator to close fully rather than nearly.
A ridge vent against an opening facet
The alternative arrangement is a hinged facet: one of the sloping panes becomes the opening light, hinged at the top and pushed out at the bottom.
A hinged facet is cheaper, because it uses a standard glazed unit and a simple chain drive, and it gives a larger clear opening for the money. It also throws the opening pane out into the weather, so it collects wind more readily and it looks like an open window from the garden.
A ridge vent opens at the highest point of the lantern, which matters more than it sounds. Hot air collects at the apex, and a vent at the apex removes it directly. A vent halfway down a facet leaves a wedge of the hottest air trapped above it.
| Ridge vent | Hinged facet | |
|---|---|---|
| Position of opening | Apex, highest point | Mid slope |
| Typical clear area | 0.2 to 0.4 m² | 0.4 to 0.8 m² |
| Hot air removal | Best available | Leaves a trapped wedge above |
| External appearance | Barely visible when open | Reads as an open window |
| Rain exposure when open | Low, sheltered by its own flap | Higher on the windward side |
| Relative cost | Higher | Lower |
The free area you actually get, and how to read the figure
Manufacturers quote either the clear opening area, which is the geometric gap, or the equivalent free area, which accounts for the fact that the flap itself obstructs part of that gap and the air has to turn a corner to get out.
Equivalent free area is the useful number and it is typically 60 to 75 per cent of the geometric opening. A vent quoted at 0.35 square metres clear might deliver 0.24 square metres of equivalent free area.
Ask which figure you are being given. On a kitchen where the vent is being counted towards purge ventilation under the building regulations, the difference between the two numbers can be the difference between compliance and a second vent.
Stack ventilation, and why height beats width
The reason a ridge vent works so well has nothing to do with the vent and everything to do with the height difference between it and the doors.
Warm air is less dense, so it rises and exerts a small upward pressure at the top of the room. Open a vent there and it leaves. That departing air has to be replaced, so cooler air is drawn in at the lowest opening available, which is your patio doors.
The driving pressure is proportional to the vertical distance between the inlet and the outlet and to the temperature difference. A vent at 3.6m with doors at floor level gives you roughly 3 metres of stack height, and on a hot afternoon with a 6 degree difference between inside and outside that moves a genuinely useful volume of air with no fan and no electricity.
Chain actuators and how they work
A chain actuator is a small motor driving a stiff articulated chain that folds flat inside its casing and extends straight when driven out. The casing is 30 to 40mm square and mounts on the frame; the chain end connects to a bracket on the opening flap.
Stroke lengths run from 200mm to 500mm and a chain unit typically pushes with 200 to 300 newtons of force. They are the standard fitting for a domestic lantern vent and they are reliable.
The visible drawback is that the chain and casing are inside the lantern and you can see them. On a well designed lantern the casing is tucked against the ridge bar in the same colour and is barely noticeable. On a badly planned one it sits in the middle of your view of the sky.
Spindle and rack drives, and where they earn their place
A spindle drive uses a rigid rack or a screw thread rather than a chain. It is stiffer, so it can push harder and pull the flap down onto its gasket with more compression, and it holds position against wind loading better than a chain.
The trade is size and cost. Spindle units are bulkier and more expensive, and they need a straight run for the rack to retract into.
Use one where the vent is large, where the site is exposed, or where a chain unit has previously failed to close the flap fully in wind. On a typical rear extension in the city a chain unit is the right answer.
24 volt against 230 volt
Most domestic lantern actuators are 24 volt direct current, fed from a transformer or a control unit sitting somewhere accessible.
24 volt is the better choice for three reasons. The wiring is low voltage, so the cable is thin and the run is not restricted in the way mains cable is. The motor can be driven at variable speed and stopped at intermediate positions. And a small battery backup can be added so the vent closes during a power cut rather than staying open.
230 volt actuators exist and are usually specified where a vent is tied into a mains smoke ventilation system. In a house they are the less flexible option, and the transformer they save is a small box.
The cable that must be run at first fix
This is the detail that costs people money, and it costs nothing to get right.
A 24 volt actuator needs a two or three core cable from the control position to the lantern kerb, arriving inside the kerb where the frame will sit. While the ceiling is open and the roof is being built, that cable is a fifteen minute job. Once the ceiling is boarded, skimmed and painted, it is a day’s work and a redecoration.
Run it even if you are undecided about the vent. A coil of unused cable in a kerb costs a few pounds. Add a second cable at the same time for a rain sensor and a third for integrated blinds, because they all terminate in the same place and the labour is in the route rather than the cable.
Wall switches, handsets and app control
The simplest control is a rocker switch on the wall, wired to the control unit, that drives the vent open while held and closed while held the other way. It is unglamorous and it never fails.
A radio handset removes the wall switch and the cable to it, which is useful in a retrofit where getting a cable down a finished wall is the difficult part. Handsets get lost.
App and smart home control adds scheduling and remote operation, which sounds like a novelty and turns out to be the feature people use most: closing the vent from the office when the forecast changes, or setting it to open at seven on a summer morning. If you want it, specify a control unit that supports it at the outset. Retrofitting a smart module to a basic controller is often not possible.
Rain sensors, and what they will not do
A rain sensor is a small heated pad on the roof beside the lantern. Water landing on it changes the conductivity across the contacts and the controller drives the vent shut. The heater dries the pad afterwards so it resets.
Fit one on any vent you cannot see from where you sit. That is nearly all of them.
Two honest limitations. The sensor reacts to the first drops, so the vent takes perhaps fifteen seconds to close and a little water gets in during that time, which is why a vent should never sit directly over a dining table if you can avoid it. And a sensor does nothing about wind. It will happily leave a vent open in a rising gale on a dry evening.
Wind sensors and exposed sites
A wind sensor is an anemometer that closes the vent above a set wind speed, typically adjustable between about 5 and 15 metres per second.
On a sheltered site behind a terrace it is unnecessary. On an exposed roof on the higher ground around the city, or where the lantern is on a rear addition that catches the prevailing south westerly across open ground, it protects the actuator and the flap from being loaded beyond what they were designed for.
An open vent in strong wind is the most likely way to damage a lantern vent, and the damage is usually to the actuator bracket rather than the glass.
Night purge, and the summer routine that works
The most effective use of a ridge vent is not during the day. It is overnight.
A kitchen extension with a large glazed roof stores heat in its floor screed, its walls and its worktops through the afternoon and releases it back into the room all evening. Opening the vent at ten at night, when the outside air has dropped below the inside temperature, flushes that heat out through the ridge and pulls cool air in through a window left ajar.
By morning the fabric is cool again and the room starts the day several degrees lower. A vent on a timer doing this from June to September changes how the room feels far more than any amount of blind. Pair it with solar control glazing, covered on roof lantern glazing and solar control, and the July problem largely goes away.
Insect mesh, and what it costs you in airflow
An open vent at ridge level, lit from inside on a summer evening, is an invitation to every moth in the garden.
A fine stainless or polyester mesh fitted within the vent aperture stops that. It also costs you airflow: a standard insect mesh reduces free area by roughly a third, and a fine pollen grade mesh by more.
Where the vent has been sized to meet a ventilation requirement, size it with the mesh in place rather than adding the mesh afterwards. Meshes also collect dust and need brushing once a season, which is another argument for a vent you can reach from a flat roof rather than one in the middle of a large lantern.
An open vent at four metres, and security
A ridge vent open 300mm on a lantern in the middle of a flat roof, with the flap held by an actuator, is not a practical route into a house. The opening is small, it is at the top of a pitched glazed frame that nobody can stand on, and forcing it means destroying the flap.
The point worth attention is the flat roof itself, not the vent. Where a flat roof is reachable from a garden wall, a bin store or a neighbouring outbuilding, the lantern becomes accessible and the calculation changes.
In that situation specify laminated glass on both leaves rather than only the inner, add a wind sensor and a rain sensor so the vent is closed by default, and consider a controller that closes everything on a single command when you leave.
Solar powered vents and their limits
Solar operated vents use a small photovoltaic panel on the lantern frame charging an internal battery that drives the actuator, with a radio handset for control. No cable at all.
They are a genuinely good answer for a retrofit into a finished ceiling where running a cable would mean taking down plasterboard. They are the wrong answer for a new build, where the cable is trivial.
The limits are honest ones. The actuator force is lower, so they suit smaller vents. Recharge depends on daylight, which is least available in the season when you most want the vent shut. And the battery is a consumable that will need replacing at a point when nobody can reach it.
Building regulations, extract and purge
Part F of the building regulations deals with ventilation and distinguishes background ventilation, extract, and purge. A ridge vent is a purge provision: it is there for rapid removal of heat, moisture or cooking smells, not for continuous background airflow.
It does not remove the need for mechanical extract over a hob, and no vent, however large, substitutes for an extractor that vents outside rather than recirculating through a filter.
Part O, which addresses overheating in new dwellings, treats openable area at high level favourably, and on a new build a ridge vent can contribute to that assessment. Confirm the figures with whoever is doing the calculation before you fix the vent size.
Servicing something you cannot reach
Actuators are sealed units and there is nothing to lubricate. What they need is that the gasket the flap closes onto stays clean and supple, and that the drainage channel beneath the vent stays clear.
The failure people report is a vent that no longer closes fully and lets a draught in. In nearly every case the cause is grit or leaf debris on the gasket seating rather than the motor.
Wipe the seating when the lantern is cleaned, once or twice a year, and the vent will outlast the controller. Where a vent is genuinely unreachable, that is an argument for placing it on the side of the ridge nearest an accessible edge of the flat roof, which is a decision taken at order stage and not afterwards.
What to specify on the order
Write down the vent type and its position on the ridge, the clear opening area and the equivalent free area, the actuator type and stroke, the operating voltage, the control method and whether it supports later smart integration, whether a rain sensor and a wind sensor are included, whether insect mesh is fitted and what it does to the free area, and the cable requirement with the position it must arrive at.
Then make sure the electrician has that last item in writing before first fix, because the cable is the one part of this list that somebody else has to install.
Tell us the room, the lantern size and whether the ceiling is open, and we will give a range by email covering the vent and its wiring. The fixed price follows the survey. The workmanship on the installation, including the vent and its weathering, carries our ten year guarantee.
Four steps, no surprises
Survey
We look at the roof, the covering and the slope before we say anything about price.
Specification
The right unit and glazing for that roof and that orientation, in plain terms.
Fixed quote
Written, itemised and firm. The number does not move once work starts.
Install
Opening formed, unit set and weathered, covering made good. Notification is ours.
Helpful reading on this
Costs, comparisons and the questions we are asked most.
Tell us about your roof
We start with the building, the covering and the slope. Then we tell you what will suit it, and what it will cost, as a fixed written number.
- Surveyed before it is priced
- 10-year workmanship guarantee
- Building Control notification handled
- New installations and replacements