
A pitched roof is the part of a building the street can actually see, which makes a rooflight in a sloping roof a different proposition from one hidden behind a parapet. This page covers setting a unit into the roof plane, proud against flush, how each covering found around Oxford is opened and made good, lead detailing, pitch limits, rafter spacing, loft conversions, and where the conservation specification is genuinely required.
Setting into the plane
A rooflight in a pitched roof is not an object placed on a roof. It is a piece of the roof, and the covering around it has to carry water past it exactly as it carried water past the slates that used to be there.
The covering is stripped back over an area wider than the unit, battens are cut, and the opening is trimmed in the structure below. The unit is set on the rafters or a trimmed frame, levelled and squared. The covering is then worked back around it, with a flashing system dressed between frame and slate so water from above is taken around the unit and returned to the roof below.
The last part is the one people underestimate. A rooflight fails at its perimeter, not through its glass, and that perimeter is made of the same material as the rest of the roof. Closing stone slate against a manufactured aluminium frame is roofing work, and on an old Oxford roof it is the most skilled part of the day.
Our scope on sloping roofs is new installations and replacements. Where a unit has reached the end of its life it comes out, a new one goes in, the flashing is renewed and the covering made good around it.
Proud or flush
Every pitched roof rooflight sits in one of two relationships with the roof plane, and choosing between them is the most consequential visual decision here.
Proud-mounted
A standard installation sits the frame above the line of the covering, with the flashing kit dressed up around it. From directly below it is barely noticeable. From the ground, and above all in raking light, it reads as a raised panel with a visible upstand and a shadow along its lower edge. On rear slopes in undesignated streets, on interwar semis and on outbuildings, that is entirely appropriate.
Flush or recessed
A flush installation sets the unit down into the roof so the outer face of the glass sits close to the plane of the covering. It needs a recessed flashing kit or a manufacturer’s flush variant, and deeper trimming so the frame can drop below the batten line. What it buys is the difference between a hole in a roof and an object on a roof, and on a designated street that is often the difference between approval and refusal.
| Proud-mounted | Flush or recessed | |
|---|---|---|
| Against the covering | Frame stands clear of the slates | Glass close to the roof plane |
| Read from the street | An added object with a shadow line | An opening within the roof |
| Structural work | Trimming to the standard opening | Deeper trimming, below batten level |
| Flashing | Standard kit for the profile | Recessed kit, plus hand-worked lead |
| Usually suits | Rear slopes, later housing stock | Front slopes, designated areas, listed buildings |
Flush units cost more and demand more of the roofer. They are not the automatic answer everywhere, and we would rather explain why a rear slope does not need one than sell an upgrade nobody asked for.
The coverings around Oxford
Oxford carries an unusually wide range of roof coverings within a short drive. Each is opened differently, closed differently, and fails differently if it is closed badly.
Cotswold stone slate
The limestone roofs of the villages west and north of the city are the most demanding covering we work in. Stone slates are laid in diminishing courses, large and heavy at the eaves reducing to small ones at the ridge, each course with its own gauge. Opening one means removing slates in a sequence that can be reversed, each set aside with its own course, because a slate from near the ridge cannot be dropped into a course near the eaves. So irregular a surface means hand-dressed lead rather than a preformed kit, and because stone roofs are heavy, cutting a rafter here is a structural decision rather than a carpentry one.
Welsh slate
The Victorian villas of North Oxford and the terraces of Jericho, Osney and East Oxford are overwhelmingly slated, much of it Welsh. Laid in courses of constant size, double-lapped and nailed to battens, slate behaves more predictably around a rooflight than anything else here. The complications are age rather than geometry. Nails corrode long before slate wears out, so opening a sound-looking roof can reveal wider nail failure at the margins, and slates cannot be re-nailed mid-area as they were originally. Those at the margins are held instead on correctly formed copper or stainless tingles.
Plain clay tile and pantile
Plain clay tiles are small, cambered, double-lapped and hung on their nibs with periodic courses nailed, common across the older villages and on Edwardian and interwar city roofs. Because they are small and curved the surface is textured rather than flat, so a flashing is dressed down into that texture at every tile rather than laid across it.
Pantiles are single-lapped and interlock sideways, with a strong profile leaving a substantial void under the flashing at every roll. That void has to be closed with lead worked into the pan, or wind-driven rain finds a route straight under the apron. A pantile roof also holds less lap in reserve, so accuracy in resetting the courses matters more.
Concrete tile
The interwar and postwar stock in Headington, Cowley, Botley, Kidlington and the estates around the ring road is largely concrete tiled, often large-format interlocking tile laid single lap. This is the easiest covering to open and close, and the one where manufacturer flashing kits do what they were designed to do. Deep-profile tiles need the deep-profile kit rather than the low-profile one, a common error on units bought online. Concrete also fades unevenly, so a new tile announces itself for years.
| Covering | How the opening is formed | How it is made good |
|---|---|---|
| Cotswold stone slate | Stripped in sequence, each slate kept with its course | Re-laid to the diminution, hand-dressed lead |
| Welsh slate | Slates eased and drawn, nail condition assessed | Salvaged slate re-laid, margins on formed tingles |
| Plain clay tile | Tiles lifted off their nibs, nailed courses cut | Re-hung to gauge, lead dressed into each camber |
| Pantile | Interlocks broken out by course, rolls cut as needed | Side laps re-established, lead worked into every pan |
| Concrete interlocking | Straight strip back, profile depth confirmed first | Salvaged tiles re-laid, new tile off visible slopes |
Salvage and matching
On an old roof, the material already up there is the only material that matches it. This is where an installation either disappears into a building or advertises itself permanently.
New Welsh slate beside hundred-year-old Welsh slate is a different shade, sheen and thickness, and stays different for a long time. New Cotswold stone reads pale and raw against limestone carrying lichen since the nineteenth century. So the covering removed to form the opening is the covering that goes back around it, stacked in course order and reused. Stripping always produces breakages, so the shortfall has to come from somewhere.
Where the shortfall comes from
Reclaimed material of the same kind. Reclaimed Welsh slate, Cotswold stone and clay tile are all obtainable, and are the first choice on any visible slope. Sorting sizes and thicknesses to match is time rather than difficulty.
Robbing a hidden slope. Where matching reclaimed stock cannot be found, sound original material is taken from a slope nobody sees, a rear outshot or a valley return, and new material goes there instead.
New material, on hidden slopes only. New stone, slate and tile all have a place. That place is rarely the elevation facing the street.
On a listed building this is more than good practice. Matching materials is routinely a condition of listed building consent, and a specification reading “reclaimed to match existing” is one an officer can approve.
Lead, laps and movement
The flashing is the working joint between a manufactured frame and a hand-laid roof, and lead still does it best because it can be dressed to an irregular surface and then left to sit there for decades.
Codes and kits
Milled lead is specified by code, a number describing thickness. Code 3 is the thinnest in general roofing use and belongs to soakers. Code 4 is the usual choice for the apron, step and cover flashings around a domestic rooflight. Code 5 is heavier, specified where pieces are larger, exposure is severe, or a listed specification calls for it. Thicker is not automatically better, because heavier lead is harder to dress into a tile camber. Manufacturer kits, matched to flat, low-profile or deep-profile coverings, work well on a regular roof but assume a consistent gauge, which is why stone slate calls for lead worked on site.
The four elements, and their laps
A rooflight perimeter is weathered in four parts. The apron at the foot carries water onto the covering below and must lie down onto the tiles. The side flashings, formed as soakers under each course with a cover over, take water passing down the slope beside the frame. The head flashing or back gutter works hardest, because everything above the unit arrives there and has to be turned sideways. On a wide unit at shallow pitch it needs real fall and depth.
Laps matter as much as codes. Pieces are lapped over one another rather than joined, and a lap of at least 100 mm is normal practice, increased to around 150 mm where the pitch is shallow. Laps running the wrong way, or reduced to save a piece of lead, are the commonest source of a perimeter that works for two winters and then does not.
Movement, and why long pieces split
Lead expands and contracts substantially with temperature, and a piece restrained at both ends has nowhere to go. It works against its own restraint, thins along a line and eventually splits. That is why lengths of step and cover flashing are kept to roughly 1.5 m and lapped rather than run continuously. Fatigue of this kind takes years to appear, so it is invisible at handover and obvious only when the owner concludes the unit was the problem. It was not. The lead was overlong.
Pitch and its limits
Every unit carries a pitch range from its manufacturer, and it is a limit rather than a recommendation. Most rooflights for sloping roofs work somewhere between about 15 and 90 degrees, with individual models narrower than that. Outside the range the flashing geometry no longer works and the warranty no longer applies.
Below the range
Shallow roofs are common on rear outshots, back additions and single-storey returns. Where the slope falls below what a unit allows, the answer is not to fit it anyway. It is a unit designed for low pitch, a purpose-made kerb lifting the frame to an acceptable angle, or a flat roof rooflight on an upstand. Shallow slopes also change the perimeter: water runs slowly, wind drives rain up the slope, and snow sits rather than sheds.
At the steep end
Steep slopes are the easier weathering condition and the harder ergonomic one. Water leaves quickly and nothing accumulates. What changes is how the unit is used. A centre-pivot unit swings a substantial amount of glass into the room, and above roughly 55 degrees the handle position wants checking rather than assuming. A top-hung unit is usually the better choice on a steep slope, and on any unit intended as an escape route.
What pitch does to appearance
The steeper the slope, the more of the rooflight the street sees. A unit on a 25 degree rear slope is heavily foreshortened from ground level and can be almost invisible from the garden. The same unit on a 50 degree front slope in a Victorian terrace presents nearly its full area to anybody standing opposite.
Rafters and openings
The width of a rooflight is not chosen from a brochure. It is chosen from what is holding the roof up.
Between the rafters
The least disruptive installation drops a unit into the gap between two existing rafters, with nothing cut. Standard rooflight widths are built around common rafter spacings, so a narrow unit will often sit between rafters at 600 mm centres. Older Oxford roofs are less obliging: common rafters were set out by eye, spacing wanders across a slope, and depths are often shallower than any current calculation would allow. The useful early question is which widths this roof can take, not which width the room would like.
Trimming a wider opening
Where the wanted width exceeds the gap available, one or more rafters are cut and the load carried around the opening. A trimmer is fixed across the head and another across the foot, spanning between the rafters either side, and those flanking rafters are usually doubled. Done casually this is a slow structural failure, and the symptom, a dip in the roof line visible from the street a few years later, cannot be undone without stripping the slope. Two smaller units aligned to the structure are often a better answer than one wide one.
Purlins and what else changes the answer
Most traditional Oxford roofs are purlin roofs: a horizontal beam runs along the slope at mid-height, supporting the common rafters and carried on the gable walls or on struts. A purlin is a primary structural member and is not trimmed around a rooflight in any ordinary domestic scheme. Its position fixes the band of slope a unit can occupy, and explains why a rooflight sometimes lands higher or lower than the room below would suggest.
Loft conversion rooflights
Much pitched roof rooflight work is part of turning a loft into a habitable room, and the moment a loft becomes habitable a set of requirements applies that does not apply to a storage space with a rooflight in it.
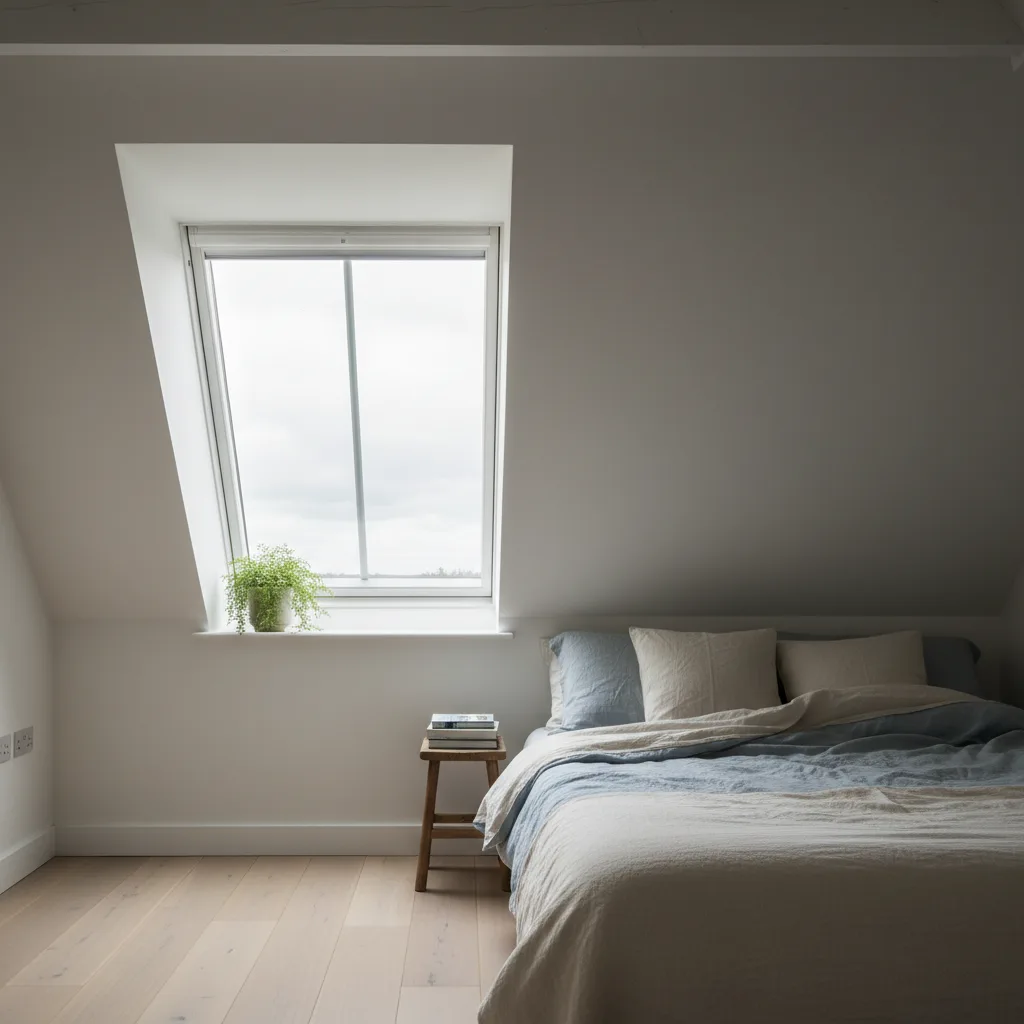
Means of escape
A habitable room in a loft needs a route out in a fire. Where the conversion does not provide a protected stairway to a final exit, an escape window is required, and rooflights commonly provide it. The guidance sets an unobstructed openable area of at least 0.33 square metres, with both the height and the width of that opening at least 450 mm, and the bottom of the opening no more than 1100 mm above the floor.
Those figures drive the specification. The unit must be large enough that its clear opening, not its overall size, meets the area. It must open in a way that leaves the aperture clear, which means a top-hung unit or a model with an escape function. And it must sit low enough for the bottom of the opening to fall within 1100 mm of the finished floor, which on a shallow pitch pushes the unit further down the roof.
Insulation and condensation
A rooflight in a converted loft interrupts the insulation line where the roof is coldest and the room warmest. Insulation has to be carried tight to the frame all the way round, and the vapour control layer continuous and sealed to the frame rather than stopped short behind the plasterboard. Where it is not, warm moist air reaches the cold frame and water forms. The owner sees it running down the inside of the reveal and concludes the rooflight is letting water in. It is not. It is condensation produced by a thermal detail nobody completed.
Building Control
A loft conversion is notifiable work, and so is forming a new structural opening in a roof. Thermal performance is assessed, and the limiting figure for rooflights is quoted in the vertical plane rather than the plane of the roof, which confuses homeowners comparing a rooflight against a window on paper. We handle the Building Control notification as part of the job. The record is worth having, because the next person to look closely at the work is usually a solicitor acting for a buyer.
The conservation specification
Somewhere in most Oxford enquiries the phrase “conservation rooflight” appears, quoted back from a planning officer or an architect and often without anybody having explained what it describes. It is a specific object rather than a category of good intentions.
Flush to the roof plane. Set into the covering rather than standing on it, so the roof still reads as one surface with an opening in it.
A dark external finish. Black or a very dark grey on frame and external trim, so the unit recedes into slate or stone. A white frame on a period slate roof is visible from a considerable distance.
A single vertical glazing bar. The centre bar is what makes the unit read as a traditional cast-iron roof light rather than a modern glazed panel, and it is the element most often omitted by a supplier who has understood the finish but not the reference.
Taller than wide. Historic roof lights were narrow and upright because they fitted between rafters and because cast iron and glass came that way. A unit in portrait proportion sits correctly in a period roof; a wide landscape panel does not.
A low, slim profile. Slim sections, minimal external upstand, no bulky cladding at the perimeter. Together these describe something that looks as though it has always been there. A conservation rooflight is not trying to be admired. It is trying not to be noticed.
Which slopes genuinely need it
The specification costs more to buy and more to install, and it is not required on every roof in the city. It is normally expected on a slope visible from a public highway, footpath or open space within a conservation area; on any slope of a listed building, because listing covers the whole building rather than the parts that can be seen; on a street subject to an Article 4 direction; and wherever a condition or an approved drawing has specified it.
It is often unnecessary on a rear slope screened by the building itself in an undesignated street, on the inner slope of a butterfly roof behind a parapet, and on interwar and postwar housing outside any designated area. We install VELUX, Fakro, Keylite and Roto units, including the conservation-pattern variants those manufacturers make. Where a standard unit in a dark finish will do the job on an unseen rear slope, that is what we will recommend.
Front slope, rear slope
The most useful question about a pitched roof rooflight is not what you want to fit. It is who can see the slope you want to fit it into. Almost everything about a pitched roof skylight installation in Oxford follows from the answer.
A front elevation slope facing a street is public architecture. It is read alongside its neighbours as part of a group, and in a designated area it is assessed on that basis. A rooflight there is a change to a shared view, which is why front slopes attract the flush, dark, upright specification.
A rear slope is usually private, but not always. Corner plots present a flank roof to a side street. Ground falling away leaves a rear roof exposed to a road behind. A footpath along the backs of gardens, a canal towpath or a taller neighbouring building can all put a rear slope firmly in public view. The test is not front or back. It is seen or unseen, and it is answered by walking round rather than by reading a plan.
Where the unit sits within the slope
Even on a permitted slope, position carries much of the visual result. Rooflights aligned with the window openings below look intentional. Rooflights scattered across a slope with no relationship to the elevation beneath look like an afterthought, and an officer assessing a designated street will say so. On a terrace the roof plane runs across several houses, so the rhythm of the row matters too.
The consent position, stated honestly
Some rooflight work in a pitched roof falls within permitted development. Those rights are narrower here than in most places. Oxford carries a very large central conservation area, a designated Victorian suburb in North Oxford, village cores absorbed as the city grew, a high count of listed buildings including ordinary terraces and cottages, Article 4 directions applied street by street, and a view-cone policy protecting the skyline.
We are installers, not the local planning authority. What we can tell you is the kind of position a building of your type in a setting of your type is usually in, what an officer assessing a roof slope looks for, and which specification tends to satisfy it. Where a determination is needed, that belongs to the council, and we say so plainly.
Where the cost lands
A figure published without seeing the roof is worth very little here, because two apparently similar jobs on adjacent streets can differ substantially. What is useful is knowing what moves the number, so two quotations can be compared honestly.

The covering. A standard unit into concrete interlocking tile is the quickest installation on this list. The same unit into Welsh slate takes longer, into hand-made clay tile longer again, and into Cotswold stone slate it is a different job in scale and skill.
Proud or flush. A recessed installation costs more in unit price, flashing, trimming and labour. On slopes that need it, that cost is not optional.
Between rafters or trimmed. A unit dropping into an existing gap avoids structural work entirely. A wider unit needing rafters cut and trimmers fitted is a structural operation with a structural price.
Unit specification. Conservation-pattern units cost more than standard ones, and glass choice, laminated inner panes, solar control on a south or west slope and electric operation all move the figure.
How many, and how they group. Several units set out as a group share access, scaffold and setting-out time, so the second rarely costs what the first did.
Access and scaffold. Height, the pitch itself, what stands beneath the elevation, and whether a scaffold on a public footway needs a licence.
What the roof turns out to be. Widespread nail failure around the opening, no salvageable surplus in the covering, or rafters measuring below what the trimming needs. These are found at survey wherever possible, so they appear in the quotation rather than halfway through the week.
The consent route. Where an application is required, that is time and fees before any work begins, and it belongs in the programme rather than arriving as a surprise.
The sequence we work
The order in which the questions are asked is most of what separates a considered installation from an expensive correction.
The building first. What it is, when it was built, whether it is listed, whether it sits in a conservation area or a street with an Article 4 direction, and which slopes are seen from public land.
The roof second. Covering type and condition, pitch measured rather than estimated, rafter spacing and depth, purlin position, insulation build-up and the availability of salvageable material. Inside the loft and on the slope, not from the pavement.
The specification third. Proud or flush, standard or conservation pattern, unit size against the structure, position against both the elevation and the room, and opening type against how the room will be used.
The consent position fourth. Whether the work sits within permitted development, whether an application is needed, and whether listed building consent is engaged in its own right.
The price last. A figure produced before those four steps is a guess, and usually an optimistic one that gets revised once the covering comes off.
Our workmanship carries a ten-year guarantee, with its coverage, exclusions and how to claim set out on its own page rather than buried in small print. We have been installing rooflights for fifteen years, we cover Oxford and up to twenty five miles by road, and we install new units and replacements only. If you are unsure whether your slope can take a rooflight at all, the useful first conversation is about the roof and its setting.
Four steps, no surprises
Survey
We look at the roof, the covering and the slope before we say anything about price.
Specification
The right unit and glazing for that roof and that orientation, in plain terms.
Fixed quote
Written, itemised and firm. The number does not move once work starts.
Install
Opening formed, unit set and weathered, covering made good. Notification is ours.
Helpful reading on this
Costs, comparisons and the questions we are asked most.
Tell us about your roof
We start with the building, the covering and the slope. Then we tell you what will suit it, and what it will cost, as a fixed written number.
- Surveyed before it is priced
- 10-year workmanship guarantee
- Building Control notification handled
- New installations and replacements