
Size a roof lantern from the floor plan of the room, not from the flat roof it will sit on. The roof tells you the maximum that will physically fit. The room tells you the size that will actually work. Those two numbers are rarely the same, and the gap between them is where a great deal of money gets spent on daylight nobody notices. This page sets out the method we use to arrive at a dimension before anything is ordered.
Glazed area against floor area, and the point of diminishing return
The working figure is glazed area as a fraction of the floor area of the room beneath. Somewhere between 12 and 20 per cent of the floor area, delivered overhead, produces a room that reads as daylit on an overcast Oxford morning in November without becoming a greenhouse in July.
Below about 8 per cent the lantern reads as an ornament. It is pleasant to look at and it does not change how the room feels at four in the afternoon in winter.
Above about 25 per cent you are into a different set of problems. Daylight in a room saturates. The eye adapts to the brightest surface it can see, so doubling the glass does not double the perceived light, but it does double the solar gain, the heat loss, the cost, and the amount of sky you have to clean. The curve flattens long before the roof runs out.
Room depth is the first measurement to take
Take the depth of the room from the rear glazing back to the wall of the original house. That single figure does more to set the lantern size than the roof area does.
Daylight from patio doors travels usefully into a room to a depth of roughly two and a half times the head height of the glazing. With a door head at 2.4m, that is about six metres. Beyond six metres from the doors, the room is running on the lantern alone.
So measure the depth, subtract the zone the doors already light well, and the remainder is the area the lantern has to serve. A four metre deep extension needs far less overhead glass than a seven metre one, even where both have the same rear elevation.
Plan proportion: the lantern should echo the room
A lantern set in a room of a different proportion always looks like it was chosen from a price list, because it was.
Work out the ratio of the room in plan. A galley kitchen at 6m by 3m is a 2:1 room and wants a 2:1 lantern running along the same axis, something like 3000mm by 1500mm. A squarer dining space at 4.5m by 4m wants a lantern closer to square.
Where a room is long and you fit a square lantern, the two ends of the room stay dim and the middle is bright, which reads as a spotlight rather than as daylight. Where a room is square and you fit a long thin lantern, one axis of the ceiling is lit and the other is not.
Ceiling height changes the answer
The higher the glass, the wider the pool of light it throws and the softer the edges of that pool.
At a standard 2.4m ceiling, a lantern lights a footprint roughly its own size plus a metre or so of spill. Raise the ceiling to 2.7m or open it up to a vaulted soffit and the same lantern lights noticeably more floor, with a gentler falloff at the edge.
This works in your favour. If the ceiling is going up anyway, the lantern can come down in size. A vaulted ceiling with the lantern at the apex is the most efficient arrangement of overhead glass available, because the glass is furthest from the floor and the splayed reveal acts as a reflector.
Finding the darkest square metre before you draw anything
Stand in the existing room on a dull day, at about three in the afternoon, and note where you would need to put a lamp on. That spot is where the lantern belongs, and its size follows from how large that dark zone is.
On a rear extension the dark zone is almost always the strip against the original back wall, between the door opening into the old house and the corners. It is the furthest point from any glass and it is shaded by the head of the opening.
A lantern sized to cover that strip and pushed towards it does more work than a larger lantern sitting in the middle of the roof. We cover positioning in more detail on roof lanterns for kitchen extensions.
Worktops, islands and the shadow you stand in
A lantern directly above a worktop puts your own shadow onto the work surface, because you stand between the glass and the chopping board. It is the same effect as a single downlight over a sink.
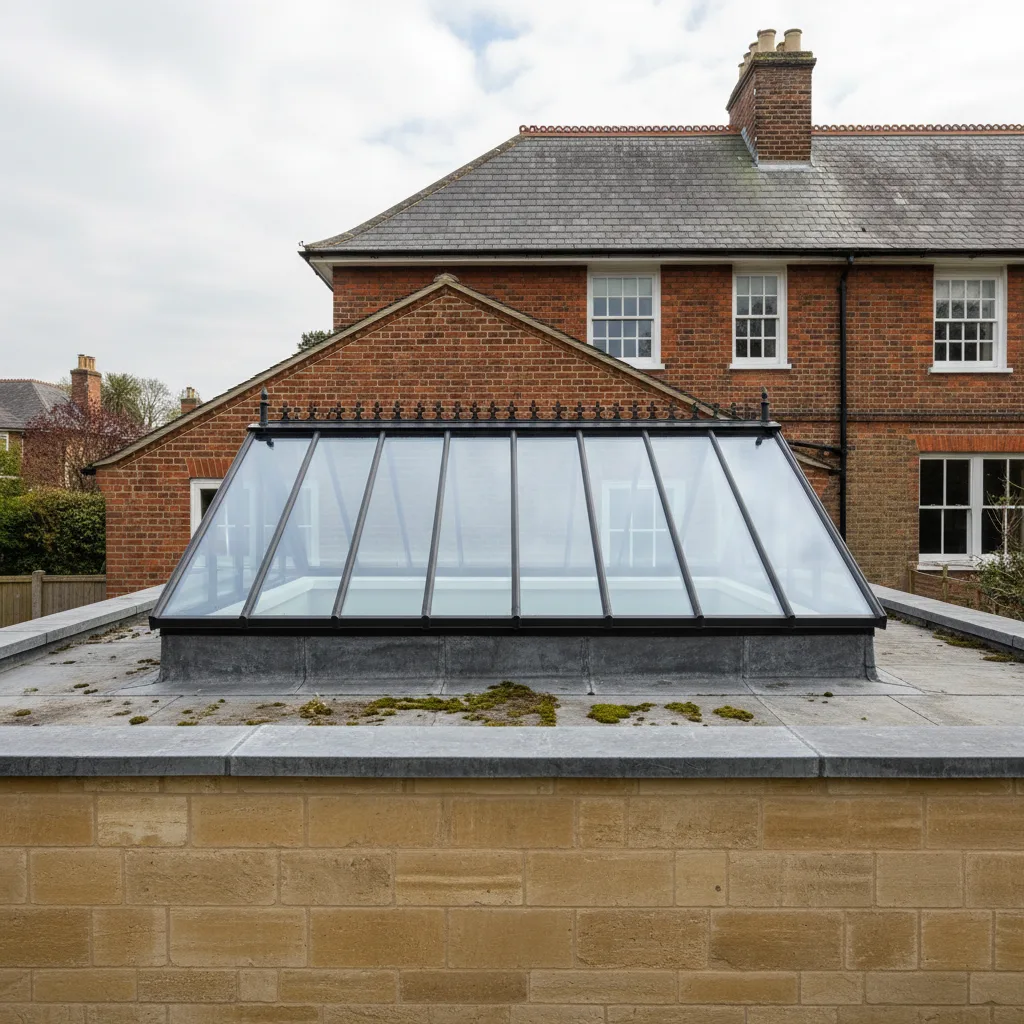
The remedy is size, not position. A large glazed area is a large diffuse source, and a large diffuse source wraps light around a person standing under it. A small one does not.
So where a lantern sits over a working island, size it to be wider than the island by at least 400mm on each side. If the budget will not carry that, move the lantern off the island and let the island be lit by a lantern that is beside it rather than above it.
Dining tables and the seated view of the sky
Over a table the calculation changes, because seated people look up and out rather than down at a surface.
From a dining chair, the amount of sky visible through a lantern is a function of its width and its height above your eye. A lantern 2000mm wide at 2.6m above the floor gives a seated diner a generous view of cloud. The same lantern at 3.5m in a vaulted ceiling gives a smaller view but a much brighter room.
If the point of the lantern is the view of the sky from the table, favour width over length and keep the ridge line running across your sight line rather than along it, so you are looking through a facet rather than up the ridge.
Two zones under one roof
Most rear extensions in Oxford contain a kitchen and a sitting or dining area under one flat roof. The instinct is one large lantern in the middle serving both. It usually serves neither.
Two smaller lanterns, one over each zone, deliver more usable light for a similar area of glass, because each is placed where it is needed. They also read better from the garden, giving rhythm to a long roof instead of one large box.
The cost is not double. Two lanterns of half the area cost more than one of full area, but not by as much as people expect, because price scales with the frame and the glass rather than with the number of deliveries. Two kerbs, two sets of trimming and two sets of flashings do add labour, and that should be priced honestly rather than glossed over.
How a large lantern gets divided into panes
Beyond roughly 1800mm along a rafter bar, a lantern facet has to be split into more than one pane, and beyond roughly 3000mm on plan you will have intermediate rafter bars whether you want them or not.
This matters at sizing stage because those divisions are visible from inside for the next thirty years. A 3000mm by 2000mm lantern might arrive with two intermediate bars, giving three panes a side, or with one, giving two. The difference is a manufacturing decision driven by glass weight and bar depth.
Ask for the bar layout drawing before you commit to a size. Sometimes trimming 100mm off a dimension removes a bar entirely. Bar depth and how slim it can go is covered on roof lantern sightlines and glazing bar thickness.
The three sets of dimensions a lantern is quoted in
This is where orders go wrong. A lantern has at least three different sizes and people quote them interchangeably.

| Dimension | What it means | Who uses it |
|---|---|---|
| Structural opening | The hole in the roof deck, inside the trimming joists | Builder, structural engineer |
| External kerb size | The outside face of the finished upstand, over which the lantern sits | Lantern manufacturer |
| Internal daylight size | The clear opening you see from the room, inside the plasterboard reveal | Nobody, until the ceiling is closed |
Lanterns are almost always ordered to external kerb size. The daylight opening you actually experience is smaller than that by the kerb thickness, the insulation and the plaster, which on a well built warm kerb can be 150mm on each side. A 2000mm lantern can present a 1700mm hole in your ceiling.
Standard sizes, and when a bespoke size earns its money
Manufacturers hold standard sizes in 250mm or 500mm steps. A standard size is cheaper and quicker, and where your roof will take one, take it.
A bespoke size is worth paying for in three situations. Where the room proportion demands a ratio no standard size offers. Where a standard size would land a rafter bar directly on the line you want to look through. And where the structure gives you a fixed opening between existing joists or steels that a standard size would waste.
Otherwise, rounding your ideal 2870mm down to a standard 2750mm costs you nothing you will ever perceive and saves a meaningful amount.
What an undersized lantern feels like
An undersized lantern is not dim. It is patchy. You get a bright rectangle on the floor and a room around it that has not changed, and because your eye adapts to the bright rectangle, the rest of the room looks darker than it did before the work.
The second symptom is that the lights stay on. The honest test of a lantern is whether the ceiling lights are off at eleven in the morning in February. If they are not, the glass area was too small for the depth of the room.
Undersizing cannot be corrected afterwards without opening the roof again, which is why we would rather have this conversation before the survey than after the fit.
What an oversized lantern costs you
An oversized lantern is a July problem and a January problem in one object.
In summer the room overheats, and the answer then is solar control glazing and opening vents rather than blinds, all of which cost more on a bigger unit. In winter the glass is the coldest surface in the room by a wide margin, so you get downdraught, and a bigger cold surface means a stronger one. Heat loss through the lantern is discussed on do roof lanterns lose a lot of heat.
There is also the roof itself. Once a lantern occupies more than about a third of the flat roof, getting a proper fall past it and away to the outlet becomes genuinely difficult, and the drainage design starts driving the architecture.
Testing a size before you commit
Two methods, both free, both better than staring at a plan.

Mark the proposed daylight opening on the floor of the room with masking tape at the correct dimensions. Stand in it, walk round it, put a chair where the table goes. People change their mind about 300mm in either direction almost every time they do this.
Then take the same rectangle and mark it on the flat roof itself, or on the joists if the roof is open, and look at it from the garden and from the first floor windows of the house. A lantern is a visible object from above as well as below, and neighbours who look down on it will see it before you do.
A worked example on an Oxford rear extension
A single storey rear extension, 6.0m wide by 4.5m deep, giving 27 square metres. Bifold doors across the rear with a 2.4m head. Kitchen along the left wall, table at the back right, opening 2.8m wide into the original dining room.
The doors light the front three metres well. The back 1.5m, roughly 9 square metres, is the zone the lantern must serve, and the darkest point is the back right corner near the table.
At 15 per cent of the 27 square metre floor, the target glazed area is about 4 square metres. A 2500mm by 1500mm lantern gives 3.75 square metres in a 5:3 proportion, which matches the wider-than-deep shape of the room. Set 900mm off the rear wall of the original house rather than centred, it lights the table, throws light back through the opening into the old dining room, and leaves enough clear roof on the door side to run a fall to the outlet.
What we need from you to size one
Send a plan of the extension with dimensions, a note of the ceiling height and whether it is flat or vaulted, the position of the kitchen run and the table, and which way the garden faces. That is enough for a range by email.
The fixed price comes after a survey, when we have measured the deck, confirmed the joist positions and the direction of the fall, and established the finished kerb height. Sizing on paper is reliable to about 100mm. The survey closes that gap, and it is the point at which the size is locked.
If the honest answer is that your room does not need a lantern, or needs a smaller one than you had in mind, we will say so. Fifteen years of fitting these has taught us that the regrets are almost never about a lantern that was slightly too small.
Four steps, no surprises
Survey
We look at the roof, the covering and the slope before we say anything about price.
Specification
The right unit and glazing for that roof and that orientation, in plain terms.
Fixed quote
Written, itemised and firm. The number does not move once work starts.
Install
Opening formed, unit set and weathered, covering made good. Notification is ours.
Helpful reading on this
Costs, comparisons and the questions we are asked most.
Tell us about your roof
We start with the building, the covering and the slope. Then we tell you what will suit it, and what it will cost, as a fixed written number.
- Surveyed before it is priced
- 10-year workmanship guarantee
- Building Control notification handled
- New installations and replacements