
The underlay is the layer most homeowners never think about and the layer that decides whether a rooflight installation survives a wet February. It sits under the battens, out of sight, and its job is to catch everything the tiles let past and carry it back out at the eaves. Cut a hole in it for a rooflight and you have interrupted the one continuous surface in the roof. What you do at that interruption, how the membrane is cut, which way it is dressed, what it is sealed to, and whether the water reaching it can still get out, is a large part of what separates an installation that lasts from one that stains a ceiling in three years. This page is about that layer and about sarking, the older boarded version of the same idea.
The layer under the battens, and what it is asked to do
Roof coverings are not watertight. They are water-shedding. Tiles and slates throw the overwhelming bulk of rain off the roof, and a proportion always gets past: driven under a lap by wind, drawn sideways by capillary action, blown in through a chipped corner, or carried in as snow through the gaps.
The underlay catches that proportion. It runs from ridge to eaves in horizontal courses, each lapped over the one below, and it discharges into the gutter. It also does a second job that matters more on modern roofs: it manages water vapour moving out of the building, either by resisting it or by letting it through, depending on which type is fitted.
Everything on this page follows from one point. Around a rooflight, that continuous shedding surface has a rectangular hole in it, and water arriving on the membrane above the hole has to be given somewhere to go that is not the inside of the roof.
Sarking means two different things
The word causes confusion because the trade uses it for two different constructions and both turn up in Oxfordshire.
Sarking boards are timber boarding laid over the rafters, under the battens, forming a solid deck. It is standard practice in Scotland and it appears here on better Victorian and Edwardian work, on some estate housing, and on buildings re-covered in the mid twentieth century. The boards are usually 19mm or 25mm softwood, sometimes tongued and grooved, sometimes plain edged with gaps.
Sarking felt is the other meaning: the underlay itself, particularly the older bitumen-impregnated type. Somebody saying “the sarking has perished” almost always means the felt, not the boards. The distinction matters because a boarded roof changes the build-up depth, the fixing method and the sequence, and because a boarded roof with felt over it has two layers to deal with rather than one.
The underlays you find on Oxfordshire roofs
| Type | Typical age of roof | Behaviour at an opening |
|---|---|---|
| Bitumen-impregnated felt, type 1F | 1930s to roughly 1990 | Vapour resistant, brittle with age, tears rather than folds, needs a ventilated void above the insulation |
| Non-breathable polymer underlay | 1980s to 2000s | Tough and floppy, dresses reasonably well, still requires ventilation of the void |
| Low resistance breathable membrane | Roughly 2000 onwards | Passes vapour, must not be blocked by insulation pressed against it, dresses and tapes well |
| Air-open membrane with taped laps | Recent and high performance work | Relies entirely on the integrity of every tape and seal, so an untaped opening undoes the design |
| Boarding with no membrane | Pre-1930s, and many barns | No second line of defence at all until one is introduced |
Identifying which one you have is the first thing that happens at survey, because it changes the specification, the sequence and sometimes the price. It is done by lifting tiles at the proposed position, not by guessing from the age of the house, since a large number of Oxford roofs have been re-covered at least once.
Why an opening is the weak point in a second line of defence
Consider what the membrane is doing in an unbroken slope. Water lands on it, runs down it, crosses each lap on the outside face, and leaves at the eaves. Nothing obstructs it and there is no vertical joint anywhere.
Now introduce a rooflight. The membrane has a hole in it, roughly the size of the unit, with four cut edges. Water running down the slope arrives at the top edge of that hole. If nothing is done, it runs straight over the cut edge and drops onto the ceiling below.
That single fact generates every detail that follows. The membrane above the opening has to be interrupted in a way that turns water aside rather than releasing it. At the sides it has to carry water past the opening. Below the opening it has to receive water discharged from the flashing without allowing any of it behind.
How the membrane is cut, and why a simple cross fails
The wrong method, and it is common, is to cut a rectangle out of the membrane the size of the opening and leave the raw edges where they fall. The second wrong method is a diagonal cross from corner to corner with the flaps folded back and stapled.
Both leave a cut edge at the head of the opening with water running towards it. A cross cut also leaves the fold lines running diagonally, so any water that does reach them is channelled towards the corner of the frame, which is the least forgiving point in the whole assembly.
The correct cut is made oversize and shaped. The membrane is cut back well beyond the frame, and the piece above the head is left long so it can be dressed over the top of the flashing rather than terminated at the frame. At the sides it is cut so it can be turned up against the frame and taped, forming a low upstand. At the foot it is trimmed to lap over the membrane in the course below, never under it.
Over the flange, never under it
This is the single rule that catches the most installations, and it is invisible the moment the tiles go back.
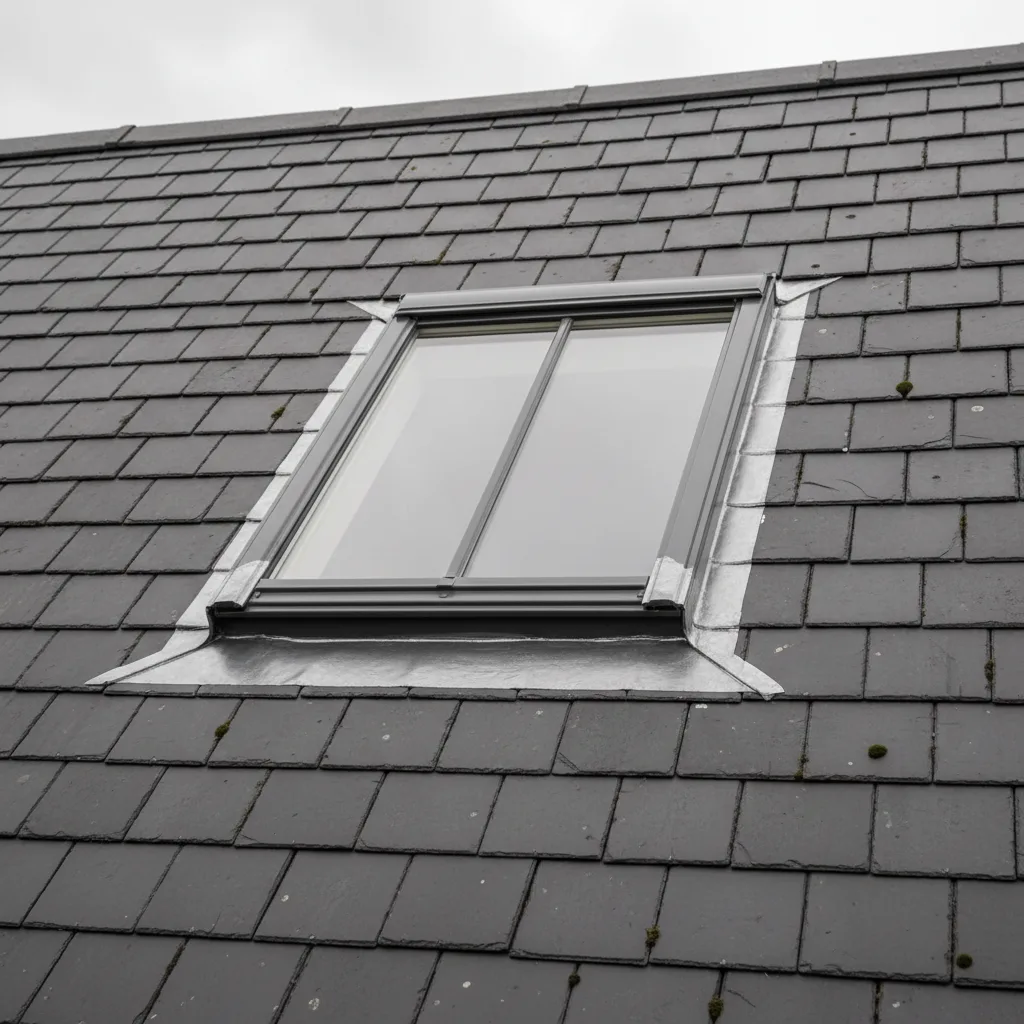
Water on the membrane above the rooflight must be delivered onto the top surface of the flashing or the underlay collar, so that it then runs down the outside of the flashing and back onto the covering below. That means the membrane laps over the flashing component at the head.
Get it the other way round, with the membrane tucked underneath, and you have built a funnel. Every drop that reaches the membrane above the unit is directed behind the flashing and into the timber. It will not show for a season or two. When it shows, it shows as a dark line along a rafter or a bloom on plaster somewhere well away from the rooflight, because water in a roof travels before it appears.
Underlay support trays, and the gutter above the unit
On a wide unit, or on a shallow pitch, dressing the membrane over the flashing is not enough on its own, because water arriving at the head spreads across the full width of the opening and needs to be taken round both sides.
The answer is a formed tray or gutter above the head. Manufacturers supply these as part of the installation kit for some models, in moulded plastic or in a stiffened membrane, shaped so that water landing on it falls away from the centre towards each side and discharges onto the membrane clear of the frame.
Where a kit component does not exist, the same shape is built from the underlay itself over a timber former, with the falls set before the battens go back. It takes twenty minutes and it is the difference between water being managed and water being hoped about. On roofs below 15 degrees it stops being optional, which we cover on rooflights on a shallow pitch below 15 degrees.
Tapes, collars and what actually adheres
Modern breathable membranes are designed to be taped, and manufacturers supply matched tapes because the adhesive chemistry has to suit the membrane surface. Generic gaffer tape does not hold on a polypropylene membrane through a hundred temperature cycles.
Three practical points decide whether a taped joint survives. The surface has to be dry and free of dust, which on a roof open for a day is not automatic and needs wiping. The tape has to be pressed with a roller or a hard hand, not laid on. And it has to be applied at a sensible temperature, because most adhesives will not grab below about five degrees. Some manufacturers also supply a pre-formed underlay collar: a shaped sleeve that fixes to the frame and laps onto the roof membrane on all four sides in the correct direction. Where one exists for the model being fitted, it is the right component, and it is ordered with the unit rather than improvised on the day.
Boarded roofs, and the depth nobody allows for
A sarking-boarded roof adds 19mm to 25mm between the rafter top and the batten, and that displacement has to be accounted for in three places.
First, the depth of the frame in the opening. A roof window is set to a specific dimension above the top of the batten so the flashing sits correctly on the covering. Ignore the boards and the unit sits proud or buried by the thickness of a board, which shows in the flashing line from the ground.
Second, the cut through the boards. They brace the rafters, and cutting them without providing trimming at the edges of the opening leaves unsupported board ends that flex under foot.
Third, the membrane over the boards, if one is present. It cannot drain into the rafter void the way it does on an open roof, so any water on it runs on the boards, and the drainage detail above the opening carries more weight than usual.
Brittle bitumen felt, and working alongside it
A 1F felt roof of fifty years is often sound between the battens and completely perished over the rafters, where it has sagged, been stretched by the batten fixings and cooked by decades of summer heat in the void. You cannot fold it, because it cracks. You cannot tape it reliably, because the surface is dusty bitumen. And you cannot pull on it, because it tears in a straight line from any nail hole.

The method that works is to introduce a new piece rather than manipulate the old one. A generous sheet of new membrane is slid up under the existing felt above the opening, so the old material laps over the new by a comfortable margin, and it is that new piece which is dressed to the flashing and turned up at the sides. The old felt is then supported so it is not left hanging on the cut edge. Nothing depends on the perished material doing any work.
Roofs with no underlay at all
Plenty of older Oxfordshire roofs never had one: stone slate on riven laths, plain tile hung on split oak, barn roofs open to the underside of the covering. Torching, a lime and hair mortar bedded under the slates, sometimes did the job instead and has usually gone.
On these roofs a rooflight introduces a modern component into an assembly that has been working, in its own way, for two centuries. The temptation to introduce a full membrane across the slope should be resisted unless the whole roof is being re-covered, because a vapour resistant layer added to a roof that was breathing freely can move condensation somewhere unhelpful.
The practical approach is local and generous. A breathable membrane is introduced across the opening and a good distance beyond it in every direction, lapped correctly with whatever it meets, and left free to drain onto the covering below rather than terminating in the void. It is a bridge, not a new floor.
The batten void, and moving air through it
With a vapour resistant underlay, the space between the underlay and the insulation must be ventilated, typically with a continuous air path from eaves to ridge. A rooflight placed in the middle of a slope divides that air path in two.
Air that was running up the slope between the rafters now meets the frame and stops. The rafter bays either side of the unit still ventilate and the bays interrupted by the unit do not, and those are exactly the bays where a warm frame meets cold membrane. The detail is a cross-path: noggins that allow air to pass sideways around the head and foot of the opening, or a counter-battened cavity running continuously above the membrane. It is a five-minute consideration at the framing stage and an impossible one afterwards.
The warm side of the same problem
The underlay handles water arriving from outside. The layer on the room side handles vapour arriving from inside, and the two have to be thought about together because a failure of the second looks exactly like a failure of the first.
Warm moist air from a bathroom or kitchen that reaches cold surfaces inside the roof condenses there. Around a rooflight reveal, where the insulation is thinner and the geometry is complicated, that is a likely place for it to happen. The result is water running down the inside of the plasterboard reveal, and every homeowner reasonably concludes the rooflight leaks. Which is why the reveal lining is sealed to the unit as a continuous layer rather than cut roughly and covered over, and why insulation is carried right up to the frame without being squashed against the membrane. The internal side of this is covered on rooflight reveals and why splaying them matters.
What a bad underlay detail looks like from inside
It rarely announces itself as a drip from the rooflight, which is why it is misdiagnosed so often.
The usual signs are a dark line along the top of a rafter some distance from the unit, a bloom or a musty smell in the loft that appears in winter only, staining that follows a batten line rather than radiating from a point, or plaster that darkens at the head of the reveal after wind from one particular direction and dries out again in still weather.
All of those point at the membrane rather than the flashing, and none of them is solved by working on the outside of the unit. Establishing which layer has been defeated is the first thing to do before anybody decides anything, and it is worth reading alongside lead flashing and weathering detail, which covers what the outer layer is meant to be doing.
Why replacing a unit is where this gets decided
On a new opening the underlay detail is built from scratch and there is no reason for it to be wrong. On a replacement it is far more interesting, because you are inheriting whatever the last installer did.
Taking out an old roof window exposes the membrane detail around it for the first time in twenty years. Sometimes it is correct and can be re-used with a new collar taped to it. Frequently it is a cut rectangle with raw edges, or a piece of old felt stapled to the frame and nothing else, working only because the flashing above it never let much through. Putting a new unit back over that without addressing it is the cheap version of the job, and it is why some replacements start leaking two winters later while the flashing looks perfect. We treat the membrane as part of the replacement, and if it needs a new sheet introduced across the opening, that is in the quotation rather than a variation raised on the day.
How we settle the membrane detail on your roof
At survey we lift the covering at the proposed position and identify the underlay type, its condition, whether there is boarding, and how the batten void ventilates. Those four answers set the specification for the layer nobody will ever see.
On site, the membrane is cut oversize and dressed, never trimmed to the frame and stapled. Falls above the head are formed before battens go back. Every lap runs the right way round, and the roof is not left open overnight at any stage of it.
This is precisely the kind of work that cannot be checked by the person paying for it, on the day or ever. That asymmetry is the whole argument for a ten-year workmanship guarantee: it is the only way an invisible layer becomes something you can hold somebody to.
Four steps, no surprises
Survey
We look at the roof, the covering and the slope before we say anything about price.
Specification
The right unit and glazing for that roof and that orientation, in plain terms.
Fixed quote
Written, itemised and firm. The number does not move once work starts.
Install
Opening formed, unit set and weathered, covering made good. Notification is ours.
Helpful reading on this
Costs, comparisons and the questions we are asked most.
Tell us about your roof
We start with the building, the covering and the slope. Then we tell you what will suit it, and what it will cost, as a fixed written number.
- Surveyed before it is priced
- 10-year workmanship guarantee
- Building Control notification handled
- New installations and replacements