
Most existing flat roofs in Oxford are cold roofs, and most rooflights we are asked to fit or replace end up going into one. It can be done and it is done every week, but a cold roof imposes conditions that a warm roof does not, and ignoring them produces water inside the house that everyone then blames on the new unit. This page is about working with the build-up you already have: how to identify it, what the opening does to it, the ventilation arithmetic, and when converting a section is the better spend.
What a cold roof is, measured at the deck
The insulation sits between or under the joists. Above it there is an air space, then the deck, then the covering. The deck is outside the insulated envelope, so in January it is close to outside temperature.
That cold deck is the whole issue. Any warm moist air from the rooms below that reaches its underside will condense there, because the underside of a cold deck is the coldest surface the air can find.
The arrangement works, and has worked for decades, on two conditions. Moist air must be stopped at ceiling level, and the void above the insulation must be ventilated well enough to carry away whatever gets past. Break either condition and the roof stops working. Cutting an opening in it threatens both at once. The broader comparison of the two build-ups sits on upstands, kerbs and warm roof build-ups; what follows assumes you have a cold roof and are keeping it.
Telling what you have without opening the roof
Measure the total depth at the edge of the roof, from the underside of the ceiling to the top of the covering. It is usually visible at the fascia or at a corner where the trim ends.
A total of 200mm to 250mm on a 1970s or 1980s extension is almost always a cold roof: 150mm or 175mm of joist, a bit of deck, a bit of covering, and insulation squeezed somewhere inside that depth.
A total of 300mm or more, especially where the covering is single ply or GRP and the extension is recent, is likely a warm roof, because the insulation is stacked on top rather than hidden within.
The second clue is ventilation. Look along the eaves and along the verge for a continuous slot, a strip of perforated soffit, or round vents at intervals. A roof with vents at two opposite edges was built as a cold roof and somebody intended it to breathe.
The 50mm rule, and what it is actually for
Guidance for a ventilated cold flat roof asks for a clear air space of at least 50mm between the top of the insulation and the underside of the deck, running the full length of the void, with ventilation openings at both ends.
Fifty millimetres sounds arbitrary. It is the depth below which air movement effectively stops, because friction against the deck and the insulation cancels the gentle pressure difference that drives the flow.
Almost every problem cold roof we open up has a void of 20mm or 30mm, because somebody fitted 100mm of insulation between 100mm joists, or pushed the insulation up tight to get another layer in. The intention was thermal and the result was a sealed cavity with a cold ceiling above it. Insulation between joists must be held down, not pushed up.
Ventilation at both ends, not one
Air has to enter somewhere and leave somewhere else. A vent at one edge alone achieves very little, because there is no path.
On a typical rear extension the void runs from the house wall out to the eaves, and the wall end is closed. That means the only available ventilation is at the eaves, on one side, and cross ventilation is impossible by geometry.
The answers are vents through the fascia at both ends where the joists run edge to edge, proprietary roof vents penetrating the covering where an edge is not available, or accepting that the void cannot be ventilated and dealing with it another way. Which of those applies is settled by which direction the joists run, so that is the first thing we establish.
What a kerb does to the airflow
A rooflight opening is trimmed with timbers on all four sides. Two of those trimmers run across the joists, and they are full depth. They are a wall across the void.
Where the joists run from the house out to the eaves, and the opening sits in the middle, the void is now divided into a section next to the house that vents nowhere and a section at the eaves that vents fine. The half that vents nowhere is directly beside a new thermal bridge.
This is the mechanism behind almost every case of water appearing near a new rooflight in cold weather. The unit is sound, the covering is sound, and the void beside it has stopped breathing. There is a fuller account of the symptom on whether flat rooflights cause condensation.
Restoring a path around the opening
There are three practical ways to keep the void ventilated once an opening is in it.
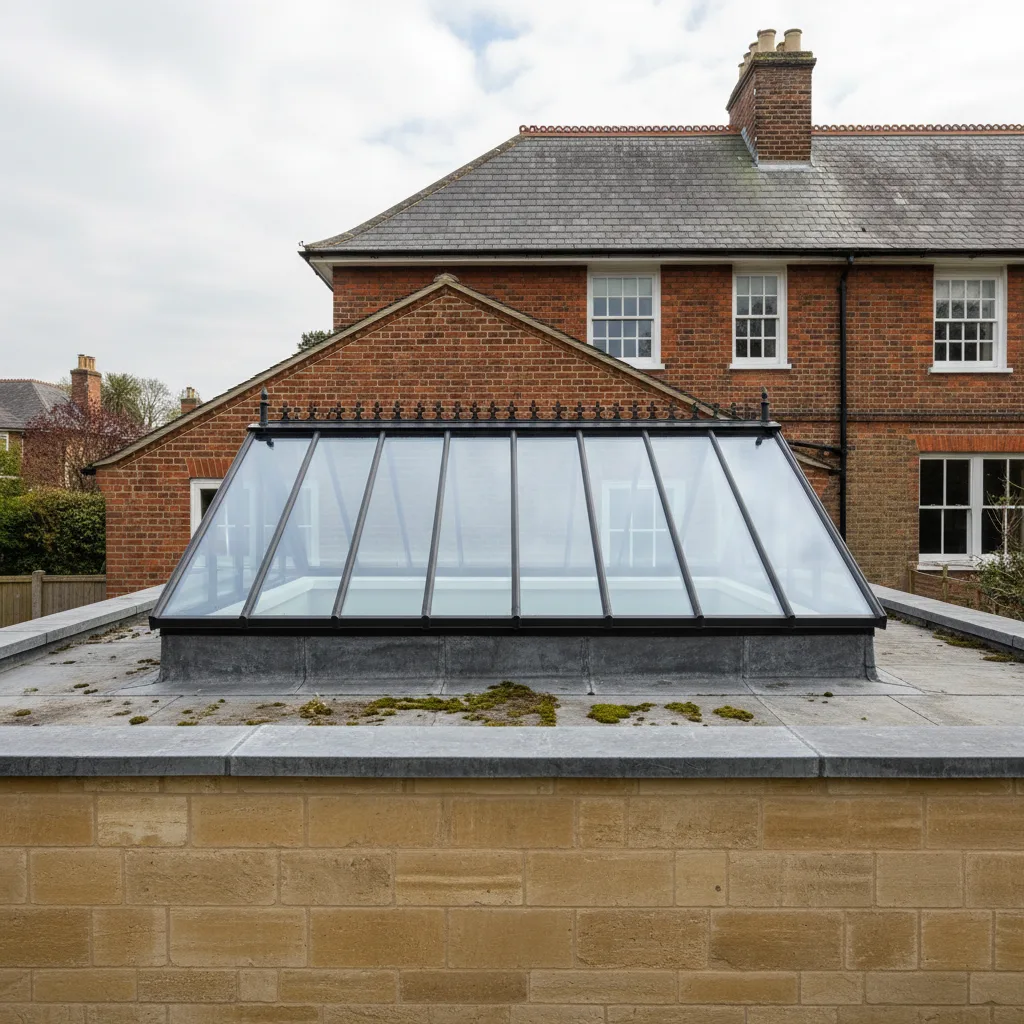
The first is to notch or drill the trimmers so air can pass through above the insulation line. This is only permissible where the structural engineer or the joist sizing allows it, and it means holes near the top of the member rather than anywhere convenient.
The second is to route air around the opening through the joist bays either side, which works where the opening is narrower than the roof and the joist bays it interrupts are few.
The third is to bring ventilation in through the covering with proprietary vents set in the isolated area, taking air from outside directly into the section that has been cut off. It is the least elegant answer and often the only one available, and the vents themselves are a penetration that has to be detailed properly.
Vapour control at ceiling level, which is the real defence
Ventilation deals with the moisture that gets into the void. Vapour control stops it getting in. The second is worth far more than the first.
In a cold roof the vapour control layer sits on the warm side of the insulation, immediately above the ceiling. In most existing houses it is either a foil-backed plasterboard, a polythene sheet, or nothing at all.
When we cut an opening we have the chance to seal that layer properly to the new frame, all the way round, with the correct tape. It takes about an hour and it is the single most valuable hour on the job. A vapour control layer that stops short of the frame is a hole positioned at the coldest object in the roof.
The holes nobody counts
Vapour control fails at penetrations, and the penetrations are usually nothing to do with the rooflight.
Recessed downlighters are the worst. A row of them in a kitchen ceiling under a cold roof is a row of open chimneys taking warm, cooking-laden air straight into the void, and every one of them is doing more damage than the rooflight ever could. Fire-rated sealed hoods or surface-mounted fittings fix it.
Then there are loft hatches, extract ducts terminating in the void instead of through the wall, and the gap where the ceiling meets the wall plate. We look for all of these on a survey of a cold roof, because if the client is about to spend money on an opening, they should know what else is feeding the problem.
Insulating the kerb on a cold roof
On a warm roof the kerb is insulated on its outside face, continuous with the roof insulation above the deck. On a cold roof there is no insulation up there to be continuous with, and the kerb still needs treating.
The kerb is a timber box standing in outside air, connected to the trimmers, which connect to the ceiling. Left bare it conducts cold straight down to the plasterboard line at the perimeter of the opening.
The practical answer is to insulate the kerb on its outside face anyway, and to bring the between-joist insulation hard up against the trimmers so the cold path is interrupted as far up as possible. It is not as clean a detail as a warm roof gives you and it is a great deal better than nothing.
The reveal, and why it goes black before the ceiling does
The reveal is the returned face between the ceiling and the frame. On a cold roof it is the least insulated surface in the room.

Left as plasterboard on battens with an air gap, that reveal will be several degrees colder than the ceiling around it, and in a kitchen it will show mould in its corners within two winters. Owners read that as a leaking rooflight. It is a cold surface in a moist room.
The fix is insulated plasterboard on the reveal, continuous with whatever insulation is in the roof, taped at the joint to the vapour control layer. Splaying the reveal outwards helps too, because it improves the light and it lets warm air from the room wash the surface instead of sitting still against it.
Converting a section to warm while the roof is open
The best answer, where the budget allows, is to stop having a cold roof in the area around the opening.
With the covering off, rigid insulation goes over the deck, the kerb is built up off the structure to suit the new depth, a new deck or overlay goes on, and the covering is renewed. The old void becomes part of the insulated envelope and the ventilation question disappears entirely.
Done across a whole small roof, this is a day or two of extra work and a new covering, and it converts a job that will be argued about into one that will not. Done as a partial conversion over part of a roof it is more awkward, because you have created a junction between two build-ups, and that junction has to be designed rather than fudged.
Hybrid build-ups, and why we are careful with them
A hybrid is insulation both between the joists and above the deck. It looks efficient and it can be a trap.
If the layer above the deck is too thin relative to the layer below, the deck ends up at a temperature where condensation can form on its upper or lower face despite everything being nominally insulated. The proportion needed depends on the materials, and it is a calculation rather than a judgement.
Where a client wants to keep existing between-joist insulation and add a warm layer, we ask for the condensation risk to be calculated before anybody commits. Where nobody wants to pay for that, the safer choice is to strip the between-joist insulation out and build a straightforward warm roof.
Signs your cold roof is not coping already
Look for these before you add an opening. Dark speckling on the ceiling in a regular pattern that follows the joists, which is thermal bridging plus surface condensation. Nail heads or screw heads showing as small marks in the plasterboard. A musty smell when the room has been shut up.
Water appearing only in cold weather, and only after a run of frosty nights, is condensation rather than rain getting in. Water appearing during or shortly after rain, and not otherwise, is not.
Where these signs are present, adding a rooflight to that roof without addressing the ventilation and the vapour control will make the situation worse and give the owner something new to blame. We say so at survey.
What we will and will not fit into a cold roof
We will fit into a cold roof where the ventilation path can be kept open or restored, where the vapour control layer can be sealed to the frame, and where the reveal can be insulated. That covers the large majority of Oxfordshire extensions and garages.

We will decline where the void cannot be ventilated at all, cannot be vented through the covering because of the finish, and the client does not want a warm conversion. That combination has no honest detail behind it, and a ten year workmanship guarantee on a roof designed to condense is not something we would sign.
Between those two, most jobs need a conversation rather than a refusal, and the conversation is short: here is the void, here is the air path, here is where the vapour layer has to be sealed, and here is what it adds.
What appears on the quotation
A quotation for an opening in a cold roof should say which build-up it assumes. It should state what happens to the ventilation of the void where the trimmers cross it. It should say that the vapour control layer will be sealed to the frame, and with what. And it should say how the reveal is insulated and finished.
We put those four lines in ours, and we would encourage anybody comparing prices to check whether the cheaper quotation contains them. Usually it does not, and the difference in price is exactly the work described in those lines.
Four steps, no surprises
Survey
We look at the roof, the covering and the slope before we say anything about price.
Specification
The right unit and glazing for that roof and that orientation, in plain terms.
Fixed quote
Written, itemised and firm. The number does not move once work starts.
Install
Opening formed, unit set and weathered, covering made good. Notification is ours.
Helpful reading on this
Costs, comparisons and the questions we are asked most.
Tell us about your roof
We start with the building, the covering and the slope. Then we tell you what will suit it, and what it will cost, as a fixed written number.
- Surveyed before it is priced
- 10-year workmanship guarantee
- Building Control notification handled
- New installations and replacements