
A flashing kit is selected by what is on the roof, not by what is going in it. The window size code tells you the width and height of the metalwork. The covering tells you which kit type it is, and that is the part that gets ordered wrong. Slate takes one kit, a low-profile concrete tile takes another, a deep pantile takes a third, and the difference between them is the height of the skirt and the shape it is pressed into so the covering can lie down against it. Order a flat kit for a profiled tile and you are left with a gap at every roll that no amount of care will close. What a kit is and how it works is covered on what is a roof window flashing kit. This page is about choosing the right one for your covering.
What a kit contains, and what it does not
A typical kit is four pressed components: a head flashing that takes water arriving from up the slope and throws it sideways, two side flashings that run down the jambs in short overlapping sections, and a cill flashing or apron that sheds water onto the covering below. Add a set of fixing clips, a foam or brush seal at the head, and printed instructions with a minimum pitch on them.
What a kit does not contain is the underlay drainage arrangement behind it, or the insulation collar around the frame. Those are separate items and they matter as much. A kit installed over an underlay that has been cut wrongly will still let water into the ceiling, because the kit was never the only line of defence.
Flat coverings: slate, fibre cement and plain tile
Natural slate, fibre cement slate and plain clay tiles are all flat coverings, and they take the low-profile kit, sometimes sold as the slate kit or the flat interlocking kit. Its skirt is shallow, typically allowing for a covering up to around 16mm thick, and its side sections lie almost flat against the roof.
Slate is the least forgiving covering to work around because slates cannot be cut and rehung freely without losing their fixings, so the side flashing has to be sized to land on whole slates where possible, and cut slates need to be secured with a hook or a tingle. Welsh slate, Cotswold stone slate and machine-made fibre cement all behave differently under the same kit, which is why a survey looks at the covering rather than at a photograph.
Profiled tiles, and the profile height that decides the kit
Interlocking concrete and clay tiles have a raised roll or a pan pressed into them, and the height of that profile is the number the kit is chosen by. Most manufacturers split their range at around 45mm: a standard profiled kit up to that height, and a deep-profile kit above it.
To measure it, lay a straightedge across a tile from crown to crown and measure down to the pan. A Marley Modern is nearly flat and takes the low-profile kit. A Redland 49 or a Sandtoft double pantile is a moderate profile. A traditional single pantile or a Roman tile can exceed 45mm easily and needs the deep kit, whose side skirt is pressed to sit over the roll instead of trying to cross it.
| Covering | Typical profile | Kit type |
|---|---|---|
| Natural slate, fibre cement slate | Flat, up to 16mm thick | Slate or flat kit |
| Plain clay or concrete tile | Flat, double lapped | Slate or flat kit |
| Low-profile interlocking tile | Under 16mm | Flat interlocking kit |
| Standard profiled tile | 16mm to 45mm | Profiled tile kit |
| Pantile, Roman, stone slate | Over 45mm | Deep-profile kit |
| Standing seam or corrugated metal | Varies by system | Purpose-made, often site-formed |
Stone slate and Cotswold roofs
Stone slate is the covering that most often defeats a catalogue kit, and there are a great many stone roofs within our working radius, out through Burford, Bampton and the villages west of Witney. The slates are thick, they diminish in course as they rise, and they are laid to variable gauge, so a standard side flashing designed for a uniform course cannot be relied on to land correctly.
The usual answer is a deep-profile kit with the side sections dressed by hand, or a lead soaker and cover arrangement worked around the frame in the traditional way. Either can be made to work. Neither is a same-day job priced from a photograph, and any quote for stone slate that does not mention the detailing at the perimeter has not looked at the roof.
Metal roofs and sheet coverings
Standing seam zinc, aluminium and copper, and profiled steel sheet, are systems rather than coverings, and the flashing has to be made by whoever knows the system. Most roof window manufacturers do not publish a kit for them, and the correct route is a purpose-formed upstand and cover in the same metal, welted or seamed into the roof by the sheet metal installer.
Where a window is planned into a metal roof, the sequence matters more than usual: the frame goes in first, the metalworker forms around it, and the two trades need to be on site in that order. On a corrugated fibre cement or steel roof over an outbuilding, purpose-made rooflight sheets in the matching profile are usually a better answer than a window and a kit.
Flat roofs: felt, single ply and asphalt
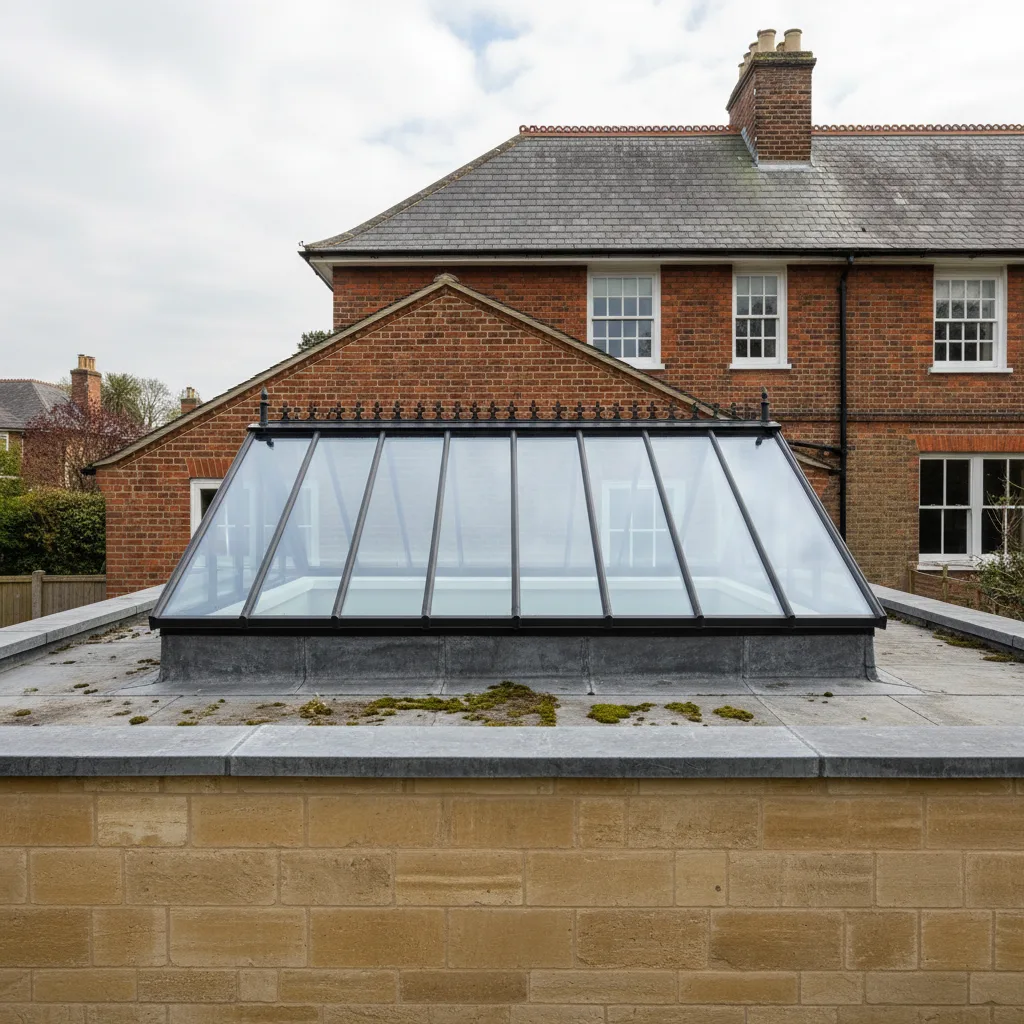
There is no flashing kit for a flat roof, because there is nothing for a kit to lap into. A flat-roof rooflight sits on a timber upstand built up from the deck, and the waterproof covering is dressed up and over that upstand and terminated under the rooflight’s own frame or a capping.
The critical dimension is the upstand height, which wants to be a minimum of 150mm above the finished surface of the covering, measured at the low point of the fall, not the high point. This is why we say the unit is the small half of the job. Anybody quoting a flat-roof rooflight without asking about the upstand and the falls is quoting for the box, not the installation.
Pitch limits printed on the kit
Every kit carries a minimum pitch, and it is not the same as the window’s minimum pitch. A window may be rated from 15 degrees while the flashing kit for a given covering is rated from 20, because the covering itself needs more fall to shed water at that lap.
Below the stated pitch the manufacturer’s warranty position changes and, more importantly, water genuinely does travel further up a shallow lap under wind pressure. If your roof is close to the limit, measure it properly with a level and a rule rather than estimating from the ground, and check the specific kit rather than the range.
Recessed kits, and when they are worth it
A standard installation leaves the sash sitting proud of the roof surface. A recessed kit sets the frame lower, so the glass finishes closer to the plane of the covering, and on a visible slope it is a noticeably quieter result.
The cost is depth. A recessed installation needs the rafter zone to allow the frame to drop, which is not always available where insulation depth is already tight, and the head detail carries more water because there is less of a step to throw it clear. On a conservation-pattern requirement the flush units are a different product again, made to sit in the plane of the slate from the outset.
Combination kits for two or more units
Where two windows sit side by side or one above the other, a combination kit replaces the adjacent side or head and cill sections with a single flashing that carries water between the units, usually with a formed gutter section and a defined minimum gap between frames.
Those gaps are not adjustable to taste. A typical side-by-side gap is 100mm and a typical stacked gap is 250mm, and the structure has to be set out to suit before anything is cut. That subject has its own page on can two roof windows share one flashing.
The underlay, and the water that gets past the tiles
Water passes tiles and slates routinely under driving rain, and the underlay is what carries it back out. Around a roof window that layer has to be cut, dressed and drained deliberately: turned up the sides of the frame, taken over the head onto a drainage gutter or apron that discharges onto the underlay below, and never simply cut off square at the opening.
Manufacturers supply an underfelt collar or drainage gutter for exactly this and it is one of the four invisible details that decide whether the ceiling stays dry. It is entirely hidden once the tiles are back. It is also the item most often left in the box.
Insulation collars around the frame
The gap between the frame and the trimmed opening is typically 20 to 30mm on each side, and it is a direct route for heat out and for cold air in. A moulded insulation collar wraps that gap in one piece before the flashing goes on.
Skipping it produces a cold frame, and a cold frame produces condensation running down the inside of the plaster reveal every winter morning. Homeowners then reasonably assume the window is at fault. It is not the window. It is a 25mm gap nobody filled.
Where the covering terminates against the frame
The rule at the head is that the covering must lap over the top edge of the head flashing, not butt against it, and there should be a clear step of at least a tile course between the flashing upstand and where the covering lands. At the cill, the apron must sit on top of the covering below with enough overhang to throw water clear of the joint.
Cut tiles at the sides need mechanical fixing, because a cut tile has lost its nib or its nail hole and will slide otherwise. On slate, a cut slate needs a hook or a lead tingle. These are small items that decide whether the detail survives fifteen winters.
Replacing a unit and reusing the old metalwork
Old flashings do not carry over. Aluminium work-hardens where it has been dressed, the clips corrode, the profiles change between generations, and a flashing that has sat under tiles for twenty years is stiff and cracked at the folds even where it looks sound from a metre away.
Every replacement we do gets a new kit matched to the covering, which is one of the reasons a replacement is a roofing job rather than a glazing swap. The full sequence is set out on replacing an old roof window with a modern unit.
Matching the kit to the size code
Once the type is settled, the kit still has to match the window’s size code exactly, because the metalwork is pressed to a specific frame width and height. A kit for a 780mm by 1180mm frame will not adapt to a 940mm frame by cutting it down, and the head flashing in particular is dimensioned to the frame rebate.

Kits are also generation-specific within a manufacturer’s range. A frame from the current range and a kit from a discontinued one may share a size code and still not clip together, because the fixing points moved. Order the kit with the window from the same range and the question does not arise. How the codes themselves work is set out on roof window sizes and how they are coded.
Conservation-pattern units and their own metalwork
A flush conservation unit is not a standard window with a different kit. It is a different frame, made deeper and with a lower external profile so the sash sits down in the plane of the slate, and its flashing is designed around that geometry with a wider side skirt to bridge to the covering.
These are ordered as a complete assembly, and mixing a conservation flashing onto a standard frame does not work. On a listed building or in a conservation area, the flush unit is often what makes the installation acceptable in the first place, so it is worth establishing the consent position before choosing anything.
The four things we measure on the roof
Four things, on the roof, not from the drive. The covering type and its profile height measured with a straightedge. The pitch, measured. The gauge and lap of the courses, so we know where cut units will fall. And the underlay condition and type, because an old sarking felt behaves differently from a modern breathable membrane and needs a different drainage detail.
From that we order a kit that matches the covering rather than one that nearly does, and we allow for the spare tiles or slates a cut course always needs. Our perimeter detailing is what the ten-year workmanship guarantee covers, and it is the reason we would rather spend twenty minutes on a roof at survey than guess. Ring 01865 704245 or email info@heritageskylightsoxford.co.uk with what is on your roof and we can tell you which kit it takes.
Four steps, no surprises
Survey
We look at the roof, the covering and the slope before we say anything about price.
Specification
The right unit and glazing for that roof and that orientation, in plain terms.
Fixed quote
Written, itemised and firm. The number does not move once work starts.
Install
Opening formed, unit set and weathered, covering made good. Notification is ours.
Helpful reading on this
Costs, comparisons and the questions we are asked most.
Tell us about your roof
We start with the building, the covering and the slope. Then we tell you what will suit it, and what it will cost, as a fixed written number.
- Surveyed before it is priced
- 10-year workmanship guarantee
- Building Control notification handled
- New installations and replacements